


Many homeowners find that a stalled or hard-starting Honda mower often traces back to fuel delivery issues within the carburetor. The most common fix involves cleaning clogged passages or replacing the entire assembly with a compatible kit. This process is manageable for DIYers who can identify their specific engine model and verify part numbers before opening the fuel system.
Understanding the difference between manual and auto-choke carburetors is critical, as they are not interchangeable. For example, a GCV160 engine may use a manual choke unit, while a GCV190 engine typically requires an auto-choke design. Using the wrong type will prevent the engine from starting or cause it to stall immediately.
If you are unsure of your specific model, checking the engine plate for the exact serial number and part reference is the first step. For broader context on electric alternatives, you might also explore our Honda lawn mower electric guide, though carburetor issues are specific to gas engines.

Pros
- Easy to follow for absolute beginners with no mechanical background
- Covers multiple machine types: mowers, generators, and trimmers
- Hardcover construction is durable enough for the workshop or garage
- Focuses on real-world fixes rather than theory
Cons
- Does not cover advanced engine overhauls or industrial-grade equipment
- May not include detailed schematics for every brand or model
- Some readers might prefer video tutorials for hands-on learning
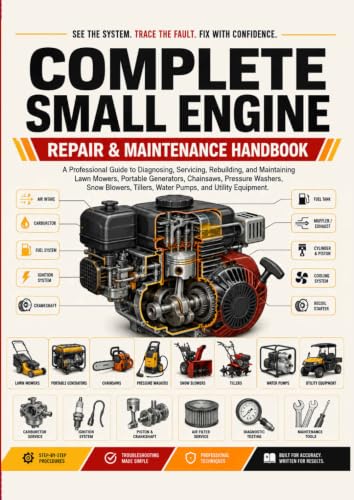
If you own a lawn mower, generator, or string trimmer, chances are you have dealt with a stubborn engine that just won't start. SMALL ENGINE REPAIR AT HOME is a practical hardcover manual written for the DIY homeowner who wants to tackle those frustrating breakdowns without calling a repair shop. It covers simple diagnostics, fuel system fixes, and seasonal maintenance specifically for the small engines found on typical yard machines.
This guide is best suited for homeowners, hobby farmers, and weekend DIYers who maintain their own property. It is not aimed at professional mechanics or heavy equipment technicians. Instead, it focuses on the common issues that plague mowers, generators, and trimmers: stale fuel, clogged carburetors, dirty air filters, and worn spark plugs. The book walks you through each repair with plain language and logical steps, making it accessible even if you have never touched a carburetor before.
In real-world use, this manual shines when you are stuck with a machine that refuses to run. It helps you systematically check fuel flow, ignition, and compression without needing expensive diagnostic tools. The seasonal maintenance sections are especially valuable for preventing problems before they start. For example, learning how to properly winterize your generator can save you from a dead engine when you need it most during a power outage. The hardcover binding is a nice touch for a shop reference book it holds up to oil-stained hands and being tossed in a toolbox.
Build quality of the book itself is solid, with thick pages and a sturdy cover that can withstand the grime of a garage. It is not a pocket guide, but the 8.5 x 11 inch format allows for clear diagrams and readable text. One realistic drawback is that it does not cover every brand or model specifically, so you may need to adapt the general advice to your particular machine. Also, if you are the type who prefers watching a video to reading, this book may feel a bit outdated. But for a focused, no-distraction reference, it is hard to beat.
Overall, SMALL ENGINE REPAIR AT HOME is a smart investment for any homeowner who wants to save money and gain confidence fixing their own yard equipment. If you have a mower that cranks but won't run, or a generator that stalls under load, this manual will likely get you back up and running. It earns a strong recommendation for the DIY crowd who values self-sufficiency and practical knowledge over calling a repairman.


Pros
- Genuine Honda OEM part, so fitment and materials are closer to the original carburetor than most aftermarket alternatives
- Includes both the carburetor assembly and mounting gaskets, saving you from buying gaskets separately
- Can revive an existing Honda HRR216 mower that's been running poorly, which is often much cheaper than replacing the engine
- Relatively small and straightforward component swap for someone with basic small engine repair skills
Cons
- Only fits the specific HRR216 models listed, so it won't work on all Honda mowers
- Carburetor replacement requires some mechanical knowledge and the right tools, which may be intimidating for first-time DIYers
- No detailed installation instructions are included in the product data, so you may need to consult a service manual or video
This is a genuine OEM Honda carburetor assembly with mounting gaskets, not a full tune-up kit with spark plugs or air filters. It is designed for specific Honda walk-behind lawn mower models, including the HRR2169PKA, HRR2169VKA, HRR216K9PKAA, and HRR216K9VKAA. If your mower is hard to start, stalls when the grass is thick, or idles unevenly, the carburetor is often the first place to look.
This replacement part is best suited for homeowners, suburban lawn owners, and DIY enthusiasts who already own one of these Honda mowers and want to restore reliable engine operation. It is also a good fit for budget-conscious shoppers who prefer to repair a quality mower instead of spending several hundred dollars on a new machine. Since this is a model-specific part, you should confirm your mower's exact model number before ordering.
On a walk-behind mower, the carburetor controls the air and fuel mixture that the engine burns. A clogged jet, stuck float, or worn gasket can lead to surging, loss of power, and poor cutting performance. Replacing the old carburetor with this genuine Honda assembly helps restore clean fuel delivery, which supports steady blade speed in normal grass and reduces the chance of stalling during longer mowing sessions. The included mounting gaskets help create a proper seal so you don't have to worry about vacuum leaks after the job is done.
Because this is a genuine Honda product, the body, float, needles, and jets are manufactured to original specifications. That matters for small engines, where aftermarket parts sometimes need extra adjusting or filing to fit right. With a true OEM piece, the mounting holes and fuel line connections should line up as expected on the listed HRR216 model variants.
The main limitation is that this kit only works with certain HRR216 versions, so it is not a universal repair part. You also need to be comfortable working with fuel system components and basic hand tools. If you have never replaced a carburetor before, you may want to watch a few repair videos or consult a service manual. For someone who already handles oil changes and air filter swaps, this kit offers a practical way to extend the life of a dependable walk-behind mower.
Overall, this carburetor assembly and gasket kit makes sense for anyone who owns a compatible Honda HRR216 and is dealing with fuel-related performance issues. It is a straightforward repair part that can bring new life to a mower that would otherwise be frustrating to use. If you like maintaining your own equipment and want to avoid the cost of a new machine, this kit is a solid choice.




The primary reason for carburetor failure in Honda mowers is the accumulation of varnish and gum from stale fuel. Ethanol-blended gasoline degrades over time, leaving sticky residues that block the tiny jets inside the carburetor. This blockage prevents the correct air-fuel mixture from reaching the combustion chamber, resulting in hard starting, rough idling, or immediate stalling. The fix usually requires removing the carburetor, disassembling it, and cleaning these passages, or replacing the unit entirely if internal components are worn.
| Component | Function | Common Failure |
|---|---|---|
| Float Bowl | Holds fuel for the carburetor | Corrosion, float sticking |
| Jets | Meter fuel flow | Clogging from varnish |
| Gaskets | Seal fuel and air lines | Hardening, cracking, leaks |
| Choke Plate | Enriches mixture for cold start | Stuck open or closed |
| Throttle Plate | Controls engine speed | Sticking, linkage wear |
Before you begin, ensure the fuel tank is empty and the engine is cool. Working with a full tank increases the risk of fuel spills and fire hazards. You will need a set of small screwdrivers, a carburetor cleaning brush, and compressed air. If you are opting for replacement rather than cleaning, identify the exact part number from your engine plate. The table above highlights the internal components that typically cause the symptoms you are experiencing.
Here is a checklist of items to verify before you start the repair process:
- Verify the engine model number on the side plate of the mower
- Confirm whether your engine uses a manual or auto-choke system
- Check the fuel tank for visible water or sediment at the bottom
- Inspect the fuel line for cracks, kinks, or hardening
- Ensure the air filter is clean and free of oil contamination
- Confirm you have the correct gasket kit for your specific carburetor
Identifying the Correct Carburetor Replacement
Honda engines vary significantly in their carburetor designs, so a generic part will not fit. The GCV160 series, common in walk-behind mowers like the HRB216 and HRR216, often uses specific part numbers such as 16100-Z0L-853 for manual choke units. In contrast, the GCV190 engine, found in larger models like the HRX217, typically requires an auto-choke carburetor with a different part number, such as 16100-Z0Y-M42. Mixing these up is a frequent error that leads to non-starting engines.
When purchasing a replacement, look for kits that include all necessary gaskets, fuel lines, and filters. This ensures that all potential failure points are addressed in one go. Some kits also include a spark plug and petcock assembly, which simplifies the installation process. Always cross-reference the part number on your old carburetor with the product description to ensure compatibility. If the part numbers match, the new unit should bolt on directly to the engine.
Removing the Old Carburetor and Fuel System
Start by disconnecting the spark plug wire to prevent accidental starting. Remove the air filter housing to access the carburetor top. You will see the fuel line entering the side of the carburetor; use a fuel line disconnect tool or a small screwdriver to release the clip and pull the line off. Be prepared for residual fuel to spill out, so have a rag ready. Next, remove the bolts or screws that secure the carburetor to the engine intake manifold.
Once the fasteners are removed, gently pull the carburetor away from the engine. You may need to wiggle it slightly to break the seal of the old gasket. If the fuel line is attached to the petcock, remove that as well. Take note of the orientation of the carburetor relative to the engine, as it must be reinstalled in the same position. If you are replacing the entire fuel system, now is the time to remove the old fuel filter and inspect the petcock for debris.
Cleaning vs. Replacing: Which Approach to Take
Deciding between cleaning and replacing depends on the condition of the internal components. If the float bowl is intact and the jets are only lightly clogged, cleaning is a cost-effective option. Use a carburetor cleaner spray to soak the passages and a small brush to remove debris. Compressed air can help clear the tiny holes, but be careful not to blow debris into other parts. If the float is stuck or the needle valve is worn, replacement is usually the better choice.
Replacement is recommended if the carburetor is cracked, corroded, or if the choke mechanism is broken. Many modern kits are pre-calibrated, meaning you do not need to adjust the idle or mixture screws. This saves time and ensures the engine runs at the manufacturer’s intended settings. If you are not confident in your ability to disassemble and reassemble the carburetor, a replacement kit is the safer bet. It eliminates the risk of leaving a small part behind or misaligning a component.
Installing the New Carburetor and Gaskets
Before installing the new carburetor, clean the intake manifold surface on the engine. Remove any old gasket material or debris to ensure a flat, clean sealing surface. Apply a thin layer of gasket sealer if recommended by the kit instructions, though many modern gaskets do not require it. Place the new gasket on the carburetor flange and align the unit with the engine bolts. Hand-tighten the bolts first to avoid cross-threading, then tighten them to the manufacturer’s specification.
Reconnect the fuel line, ensuring the clip is fully seated to prevent leaks. If you are using a new fuel filter and petcock, install them now. Reattach the air filter housing and secure it with its screws. Double-check that all connections are tight and that no fuel lines are kinked or pinched. This step is crucial to prevent fuel leaks, which can be a fire hazard. If you are unsure about the torque specifications, refer to the mower’s owner’s manual for the correct values.
Testing the Engine and Adjusting the Mixture
Once the carburetor is installed, fill the fuel tank with fresh gasoline. Do not use old fuel that has been sitting for more than 30 days. Start the engine and let it idle for a few minutes. Listen for any unusual noises or hissing sounds, which could indicate a vacuum leak or fuel leak. If the engine runs rough, check the idle speed screw and adjust it slightly to stabilize the RPM. The engine should idle smoothly without stalling.
If the engine is hard to start, check the choke operation. For manual choke models, ensure the choke plate moves freely and is fully closed when the engine is cold. For auto-choke models, verify that the thermostatic element is intact and not clogged with debris.
If the engine still runs poorly, re-inspect the gasket seals and fuel line connections. A small air leak can significantly affect the air-fuel mixture, causing the engine to run lean or rich. If the issue persists, consider replacing the spark plug or checking the ignition system.
Common Errors and How to Avoid Them
One of the most common mistakes is using the wrong carburetor for the engine model. Always verify the part number and engine displacement before purchasing. Another error is forgetting to replace the gaskets, which can lead to fuel or air leaks. Old gaskets harden and lose their ability to seal, so they should always be replaced during a carburetor service. Additionally, using stale fuel can undo all your work, so always drain the tank before storage or long periods of non-use.
Here are the key points to remember to avoid these common pitfalls:
- Always match the carburetor part number to the engine model
- Replace all gaskets and seals during the repair process
- Use only fresh gasoline with the correct octane rating
- Check for fuel leaks before starting the engine
- Ensure the air filter is clean and properly installed
- Verify the spark plug gap matches the manufacturer’s specification
Maintenance Tips to Prevent Future Carburetor Issues
Prevention is the best way to avoid carburetor problems in the future. Always use fresh fuel and add a fuel stabilizer if you plan to store the mower for more than 30 days. Run the engine until the tank is empty before storage to prevent fuel from sitting in the carburetor. If you mow frequently, consider using a fuel treatment to keep the system clean. Regular maintenance of the air filter and fuel filter also helps prevent debris from entering the carburetor.
For seasonal storage, disconnect the fuel line and drain the carburetor bowl if possible. This removes any remaining fuel that could degrade and cause clogs. When you are ready to use the mower again, fill the tank with fresh fuel and replace the fuel filter. This simple routine can extend the life of your carburetor and ensure reliable starting.
If you are unsure about the specific maintenance requirements for your model, consult the owner’s manual or a trusted repair guide like premium grade mower blade resources for broader maintenance context, though fuel system care is specific to the engine.
By following these steps, you can effectively fix or replace the carburetor in your Honda lawn mower. The key is to identify the correct part, use fresh fuel, and ensure all seals and connections are tight. If the engine still does not run correctly after the repair, consider consulting a professional mechanic to diagnose other potential issues. Proper maintenance and timely repairs will keep your mower running smoothly for years to come.


Write Your Review
No reviews yet. Be the first to share your experience!