


Cold temperatures and dense winter air often create difficult ignition conditions for outdoor power equipment. When engines sit in cold storage for weeks or months, learning how to start snow blower or seasonal power machinery requires understanding the precise sequence of fuel priming, choke adjustment, and ignition activation. Routine prep work such as inspecting oil levels, checking for fresh fuel, and ensuring clean air filter maintenance prevents unnecessary strain on the starter mechanism. A methodical approach ensures the cylinder receives the correct air and fuel ratio needed to spark on the first or second pull.
Stubborn engines often suffer from gummed carburetor jets or degraded gasoline that separated during extended storage. Understanding fuel shut-off valves, safety ignition keys, and proper primer bulb operation eliminates much of the frustration associated with cold-weather outdoor chores. Small engine reference manuals and symptom-based diagnostic guides provide homeowners with structured troubleshooting sequences when equipment refuses to fire. With the right starting habits and diagnostic resources on hand, maintaining consistent cold-weather starting reliability becomes a manageable task.


Essential Starting Procedures and Troubleshooting for Outdoor Blower Engines
Starting an outdoor power equipment engine in freezing ambient temperatures requires a disciplined sequence that delivers the right mixture of atomized fuel and compressed air directly into the combustion chamber. When mastering how to start snow blower, rushing the starting process or skipping basic mechanical checks often results in fouled spark plugs, drained starting batteries, or flooded carburetors. Cold metal parts contract, motor oil thickens, and gasoline evaporates much more slowly in sub-freezing weather than during summer operation. Following a standard cold-start sequence allows the ignition system to ignite the fuel charge quickly without causing unnecessary wear on the recoil assembly or starter motor.
Pre-Start Fluid and Safety Switch Inspection
Before touching the starter cord or electric ignition button, inspecting fluid levels stands as the most critical protective habit for any small engine operator. Engine oil must sit within the crosshatched safe zone on the dipstick because many modern overhead valve engines feature low-oil safety shutdown switches. If oil levels drop below the minimum threshold, the safety sensor prevents electrical current from reaching the ignition coil, which produces an immediate no-spark condition. Using winter-grade motor oil with lower cold viscosity ensures rapid lubrication across the crankshaft and cylinder walls during initial rotation.
Fuel freshness requires equal scrutiny prior to attempting an initial start after the machine has sat idle. Gasoline that remains untreated for more than thirty days begins oxidizing, losing volatile light ends that are vital for vaporizing in cold weather. Fresh fuel mixed with an appropriate stabilizer prevents gum from settling in the float bowl and blocking narrow passages. Operators should also verify that the plastic safety key is fully inserted into the ignition receptacle, as a loose key grounds the primary ignition circuit instantly.
Setting the Fuel Valve, Throttle, and Choke Controls
Engaging the fuel shut-off valve represents a simple step that is frequently overlooked during cold-morning start attempts. Many machines incorporate a manual petcock beneath the fuel tank that isolates the carburetor float needle during storage to prevent hydraulic lock. Turning this valve parallel to the fuel line allows gravity to fill the carburetor bowl with fresh fuel. Without an open valve, the engine might fire briefly on residual fuel or primer charges and then stall abruptly within seconds.
Setting the throttle lever to the fast or run position establishes proper airflow and engages the governor linkage for startup. Next, closing the choke butterfly valve fully restricts incoming air, which creates a high-vacuum condition inside the carburetor bore during cranking. This high vacuum pulls a rich fuel-to-air charge through the main jet and idle circuits into the intake manifold. Cold engines require this fuel-heavy mixture because condensed gasoline clings to cold metal intake ports rather than staying suspended in the air stream.
Mastering the Primer Bulb and Cold Air Fuel Ratios
The flexible rubber primer bulb acts as an external pump designed to charge the intake tract with atomized gasoline before the crankshaft begins spinning. Pressing the primer bulb forces fuel directly into the carburetor throat, bypassing normal venturi vacuum during manual cranking. Most four-cycle power equipment engines require between three and five deliberate presses when starting from a completely cold ambient temperature. Operators should press the center of the bulb firmly, pause for one second between compressions, and allow the bulb to expand completely before pressing again.
Over-priming poses a significant risk that can stall an entire startup routine by drenching the combustion chamber with liquid gasoline. When too much raw fuel enters the cylinder, the spark plug electrodes become wet, which dissipates electrical spark across the insulator instead of jumping the gap. If the engine smells strongly of unburned gasoline after several pushes, pausing for several minutes allows the excess vapor to dissipate naturally. Adjusting primer counts based on temperature helps maintain an optimal air-fuel balance, requiring fewer pushes in mild conditions and additional priming during sub-zero mornings.
Recoil Pull-Cord Technique Versus Electric Push-Button Ignition
Operating a manual recoil starter cord requires smooth, deliberate mechanics to prevent snapping the starter rope or stripping internal dog ears. The user should grasp the starter handle and pull gently until mechanical resistance is felt, indicating that the starter pawls have engaged the flywheel cup. Once resistance is confirmed, pulling the handle with a swift, full arm stroke spins the engine over with maximum rotational momentum. Never release the handle at the apex of the pull, as snapping the handle back against the housing can crack the recoil shroud.
Electric starting systems provide a convenient alternative that eliminates physical shoulder and arm strain during freezing weather. Most 120-volt plug-in starter motors require an outdoor-rated extension cord connected directly to a grounded domestic wall outlet. Once connected, pressing the starter push button spins the internal bendix gear directly into the ring gear on the flywheel. Starter engagement should always be limited to short bursts of no more than five seconds, with brief cooling intervals between attempts to protect starter windings from thermal overload.
What to Do Immediately After the Engine Fires and Warms Up
As soon as the engine catches and begins running under its own power, adjusting the choke position becomes the immediate priority. Leaving the choke plate closed on a running engine causes an overly rich fuel mixture, which leads to heavy black exhaust smoke, erratic surging, and fouled spark plugs. The operator should gradually move the choke lever from full choke to half choke as engine speed stabilizes over the first ten to fifteen seconds. Once the engine runs smoothly without hunting or sputtering, moving the lever to the fully open or run position completes the cycle.
Allowing the machine to idle at operational speed for two to three minutes permits internal engine oil to circulate thoroughly through the crankcase. Cold oil requires adequate warm-up time to reach optimal viscosity and coat critical bearing surfaces, pushrods, and valve stems. Sudden throttle changes or loading the engine before reaching stable operating temperature increases mechanical wear and can cause unburned fuel washdown along the cylinder walls. Listening to the exhaust note during warm-up provides immediate confirmation that fuel delivery and governor operation are functioning harmoniously.
Troubleshooting No-Start Symptoms: The Fuel Delivery Circuit
When an engine cranks continuously without firing, the fuel delivery circuit represents the most frequent source of mechanical trouble. Stale fuel stored in an open tank absorbs ambient moisture through ethanol phase separation, leaving water droplets and corrosive sediment settled at the bottom of the carburetor float bowl. Silt and varnish easily plug the microscopic pilot jet, preventing the engine from drawing fuel through the idle passages. Installing fresh engine tune up kit components such as replacement fuel lines and inline filters helps restore steady fuel flow from tank to carburetor.
Inspecting the carburetor float and inlet needle valve helps determine whether fuel is actually entering the mixing chamber. If the needle valve sticks closed against the brass seat due to old fuel residue, the bowl remains dry regardless of tank volume. Tapping the carburetor bowl lightly with the plastic handle of a screwdriver can occasionally free a sticky float needle. If fuel fails to enter the cylinder after tapping, removing the bowl retaining bolt allows the operator to inspect the internal bowl cavity for rust, water, or gelatinous varnish deposits.
Spark Plug Inspection and Ignition System Diagnostics
A reliable ignition spark is necessary to detonate the compressed fuel charge inside the cylinder under cold operating conditions. Removing the spark plug with a dedicated deep-well socket permits visual evaluation of the firing tip, ceramic insulator, and electrode gap. A healthy spark plug displays a dry, light tan or grayish deposit across the ground electrode after normal operation. Heavy black soot indicates excessive choking or a rich fuel mix, while thick oil deposits point toward worn piston rings or valve guides.
Testing for electrical continuity requires grounding the threaded metal body of the spark plug against bare engine metal while the plug wire remains attached. Pulling the recoil starter or depressing the electric starter button should reveal a crisp, bright blue spark jumping across the electrode gap. A weak yellow spark or complete absence of spark indicates ignition coil failure, faulty armature air gap spacing, or a grounded stop switch. Checking the spark plug gap with a wire feeler gauge ensures the distance matches manufacturer specifications, preventing misfires under compression.
Dealing with Flooded Cylinders and Clearing Excess Fuel
Repeated cranking with full choke or excessive primer presses frequently results in a severely flooded engine condition. In this scenario, liquid fuel coats the combustion chamber and wets the spark plug, preventing the ignition spark from jumping between electrodes. Correcting a flooded condition begins by moving the choke lever to the completely open or off position and pushing the throttle to high. Pulling the recoil starter cord ten to fifteen times with the choke wide open draws fresh air through the cylinder to evacuate raw gasoline vapor.
If clearing the cylinder with open throttle fails to initiate ignition, removing the spark plug becomes necessary to dry the combustion chamber manually. Grounding the spark plug boot away from the open spark plug hole prevents stray sparks while cranking the engine several times to blow excess fuel out through the head. The removed plug can then be dried thoroughly using a clean rag, compressed air, or clean electrical contact cleaner. Reinstalling the dry spark plug and attempting a restart with zero choke and zero priming usually allows the engine to catch and clear itself.
Comparing Cordless and Gas Powered Cold-Weather Platforms
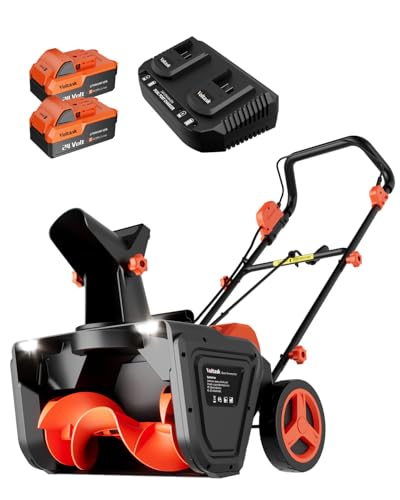
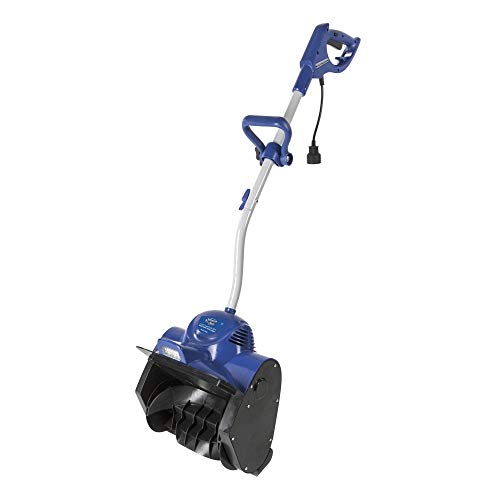
Homeowners evaluating winter clearing tools often weigh the simplicity of battery power against the heavy-duty endurance of gas engines. Battery powered platforms eliminate carburetor varnishing, oil changes, and pull-cord strain by relying on push-button electronic controllers. Exploring options like modern electric snow blowers with lights demonstrates how instant starting convenience benefits residential operators who need clean clearing without mechanical fuss. However, lithium-ion battery packs lose significant discharge capacity when stored in unheated sheds, requiring operators to keep battery packs indoors until the moment of use.
Gas powered engines deliver sustained runtimes and independent power far away from electrical cords or battery charging docks. The primary tradeoff lies in the ongoing mechanical upkeep required to maintain fuel systems and ignition components against seasonal deterioration. Understanding the differences between power formats helps property owners match equipment capabilities with their physical endurance and winter maintenance comfort. Whether maintaining a gas engine or operating modern cordless gear, consistent pre-season maintenance ensures dependable cold-start response when weather strikes.
Off-Season Fuel Care and Storing Outdoor Power Equipment
Preventing hard starting issues during winter begins with disciplined fuel management before the off-season storage period arrives. When gasoline sits inside a small engine carburetor for months, light hydrocarbons evaporate, leaving heavy resins that coat main jets and emulsion tubes. Homeowners should either drain the fuel tank completely and run the engine until the carburetor runs dry, or fill the tank with ethanol-free fuel treated with a quality stabilizer. Running treated fuel through the engine for five minutes guarantees that protected fuel fills the internal carburetor circuits.
Inspecting rubber fuel lines, fuel tank grommets, and primer bulbs prior to storage identifies cracked or brittle components before they cause air leaks. Air entering the fuel line upstream of the carburetor leans out the mixture, causing surging, backfiring, and stubborn starting behavior. Storing the machine in a dry, ventilated shed or garage protects electrical switches from oxidation and shields metallic linkages from corrosion. Clean equipment stored in stable conditions reliably fires up season after season with standard starting sequences.
Diagnostic Manuals and Systematic Small Engine Repair Strategies
Homeowners seeking long-term starting reliability benefit substantially from consulting detailed reference books tailored to outdoor power equipment. In-depth repair literature such as The DIY Small Engine Repair Bible outlines step-by-step procedures for rebuilding gummed carburetors, setting ignition air gaps, and diagnosing fuel delivery problems across seasonal machines. Having a structured reference on the workshop bench helps users understand why specific starting faults occur rather than guessing at component replacements. Detailed guides explain the underlying mechanical physics behind combustion, valve timing, and fuel regulation in clear, practical terms.
When an engine cranks but refuses to sustain combustion, symptom-first troubleshooting charts streamline the path from diagnosis to correction. Using analytical resources like Small Engine Diagnosis: The Symptom-First Guide enables equipment owners to isolate fuel starvation, weak ignition spark, or compression loss through systematic testing. Rather than buying unneeded replacement parts, operators learn to test fuel flow at the carburetor bowl and verify spark energy at the plug. Adopting structured diagnostic habits saves considerable time and ensures that small engine machinery remains dependable whenever winter chores demand immediate starting performance.
Mastering how to start snow blower ultimately depends on respecting the fundamental mechanical requirements of internal combustion engines: clean fuel, uninhibited airflow, strong electrical spark, and proper control modulation. Taking a few seconds to inspect oil levels, prime the carburetor deliberately, and set the choke properly prevents frustrating delays and preserves starter components. When stubborn starting issues do emerge, following systematic diagnostic routines and consulting trusted repair guides restores smooth operation quickly. With disciplined seasonal habits and regular mechanical inspections, cold outdoor power equipment will reliably roar to life with minimal effort.



Write Your Review
No reviews yet. Be the first to share your experience!