


Reaching into an equipment storage tote or recovering from a thrown chain during heavy cutting often leaves operators staring at what looks like a hopeless knot of metal. Learning how to untangle a chainsaw blade is a fundamental skill for anyone maintaining outdoor power equipment, whether you are running professional forestry saws or maintaining property with two-stroke engine powerheads. Although the interlinked cutters and drive tangs appear permanently jammed together, the chain is simply folded through its own opposing loops. Understanding how the links pivot allows you to release the binding without bending tie straps or damaging precision cutting edges.
Chainsaw chains and circular clearing attachments naturally twist into figure-eight configurations when stored loosely or derailed under torque. Forcing the steel links with pliers or screwdrivers will only burr the metal, bend drive links, and ruin the alignment required for smooth guide bar travel. Taking a systematic approach protects your hands from razor-sharp cutters while ensuring your cutting assembly returns to service quickly and safely. With proper handling techniques and basic mechanical inspection, you can untangle the tightest loops in seconds and verify that every cutter remains ready for clean, straight woodcutting.

Technical Guide to Untangling Chainsaw Chains and Clearing Bound Blades
A snarled cutting chain presents a unique mechanical puzzle that frequently frustrates woodcutters after an unexpected derailment or off-season storage. Resolving this issue does not require brute physical force, but rather an understanding of chain articulation and loop geometry. Once you recognize how the interlocking drive tangs slip across one another, unwinding the tightest knot becomes a predictable, repeatable process.
The Geometry of a Tangled Chain Loop: Why Saw Chains Knot
A standard saw chain consists of drive links, drive rivets, tie straps, and alternating left and right cutters joined in a continuous, flexible track. Because each rivet allows bidirectional pivoting along a single axis, the chain can easily fold over its own length whenever tension is removed. When dropped into a bucket or jostled in a transport case, one section slips through an adjacent opening, creating opposing closed loops. The result looks like a tangled mess, yet the chain has not actually formed an impossible knot because the loop remains continuous without an open end.
The interlocking occurs when the drive links, which normally glide smoothly through the guide bar groove, point inward and snag against the outer tie straps. As tension pulls the bundle tighter, the protruding depth gauges and cutter heels hook into neighboring links, locking the assembly into place. Brute force simply drives these hardened steel corners deeper into adjacent components, risking burred drive tangs and ruined edges. Recognizing that the chain is merely resting in a nested figure-eight configuration is the key to unwinding it without causing mechanical damage.
Preparation and Safety Protocols Before Handling Tangled Cutters
Sharp chain cutters can easily slice through skin during untangling, making heavy-duty hand protection the first requirement before touching the chain. Heavy split-cowhide work gloves or Kevlar-reinforced forestry gloves provide essential defense against razor-sharp chrome-plated tooth edges. You should never attempt to manipulate a snarled chain with bare hands, especially if the cutters have recently been filed or ground. Working on a wide, stable workbench or a flat sheet of clean plywood also keeps dirt, grit, and woodchips out of the chain joints.
Before working on any cutting gear attached to a saw, confirm that the equipment cannot energize unexpectedly. Disconnect the spark plug boot on gasoline saws, or depress the latch and remove the battery pack on modern cordless equipment. If you are comparing equipment platforms, reviewing battery and electric chainsaw cutting performance provides helpful perspective on modern powerhead ergonomics and maintenance differences. Taking these preliminary steps guarantees that your workspace remains safe while you focus entirely on manipulating the steel loop.
Step-by-Step Procedure to Untangle a Knotted Chainsaw Chain Loop
The untangling process begins by laying the tangled bundle flat on your clean work surface so you can analyze its physical layout. Spread the outer segments of the chain outward as far as they will move without pulling hard or creating resistance. Look closely at the center of the bundle to locate the two primary interlocking loops that form the core obstruction. These two inner loops will invariably be turned in opposite directions, with one set of cutters facing upward and the adjacent set facing sideways or downward.
Grasp the top loop with your gloved thumb and forefinger, gently lifting it upward while keeping the rest of the chain resting on the table. Rotate this lifted loop approximately 180 degrees to align its drive tangs in the same general direction as the surrounding chain. By changing the angle of this loop, you relieve the mechanical wedging between the cutter heels and neighboring tie straps. Do not pull upward abruptly, but instead maintain light, continuous tension while wiggling the loop back and forth across its pivot axis.
Once the primary loop rotates, push the bundle gently toward the center opening so the slack allows the nested section to drop downward. As the drive links clear the surrounding tie straps, the secondary loop will naturally unroll under the influence of gravity. If a link catches along the way, pause to verify that a drive tang has not hooked on a depth gauge. Gently nudge the snagged link sideways with your thumb until it slips cleanly through the gap, allowing the loop to expand into an oval.
Hold the chain by two opposite ends of the newly expanded oval and let it hang vertically to confirm all kinks have released. Every drive link should now hang in a uniform plane with all cutter edges pointing around the perimeter in a single cutting direction. If a secondary twist remains, lay the chain flat once more and repeat the gentle rotational flip on the smaller sub-loop. With practice, this entire untangling procedure takes less than thirty seconds once your fingers learn the natural motion of the steel joints.
Inspecting Drive Links, Tie Straps, and Rivets for Mechanical Damage
A chain that tangled during storage is usually undamaged, but a chain that derailed from the guide bar while cutting requires rigorous physical inspection. High-speed chain derailment often batters the pointed drive tangs as they strike the chain catcher pin or the guide bar tail. Carefully inspect each drive link around the entire perimeter, feeling for raised metal burrs, mushroomed edges, or peened steel that could jam inside the guide bar rails. Running a chain with mushroomed drive tangs will rapidly score the bar groove and cause severe engine bogging under load.
You can remove minor drive tang burrs quickly using a standard flat mill bastard file positioned at a right angle to the link. Stroke the file smoothly across the flared sides of the drive tang until the thickness matches the original gauge of the chain. However, if a drive link exhibits deep gouges, cracks, or heavy distortion, dressing it with a file is no longer sufficient. Severely distorted links weaken the tensile strength of the loop and can lead to dangerous chain breakage during heavy bucking operations.
Examine the connecting tie straps and factory rivets to confirm that every joint flexes freely without binding or excessive side-to-side play. Grab individual pairs of links and pivot them back and forth by hand to check for tight or frozen joints caused by impact damage. A stiff joint prevents the chain from wrapping smoothly around the nose sprocket and drive drum, generating intense friction and heat. If you discover stretched rivets, cracked tie straps, or frozen pivot pins, the damaged section must be broken out and replaced with fresh preset straps by an experienced small engine technician.
Remounting and Proper Tensioning on the Guide Bar
Reinstalling the untangled chain begins with confirming the correct directional orientation across the guide bar and drive sprocket. The top run of the chain must always point forward toward the nose, meaning the sharp cutting edges face away from the powerhead along the upper bar rail. Loop the rear section of the chain over the drive rim or spur sprocket, ensuring every drive link seats fully into the sprocket teeth. When working on vintage equipment or classic property maintenance chainsaws, matching the correct pitch and sprocket layout is critical to preventing immediate drive derailment.
Guide the drive links into the upper bar groove, then wrap the chain around the nose sprocket while easing the bar forward on its mounting studs. Fit the clutch cover plate over the mounting studs and thread the bar nuts finger-tight so the guide bar can still slide forward and backward during tensioning. Lift the nose of the guide bar upward with one gloved hand to eliminate assembly play while turning the side-access tensioning screw clockwise with your scrench. Holding the nose up during this adjustment prevents the bar from dropping and sagging under cutting resistance later.
Tension the chain until the lowest tie straps and cutter heels contact the bottom rail of the guide bar with no visible belly droop. Perform a snap test by pulling down firmly on the center of the bottom chain run and releasing it; the drive links should snap instantly back into the groove. While wearing gloves, pull the chain along the top rail by hand to confirm that it rolls smoothly without binding or tight spots. Finally, torque the dual bar nuts firmly while continuing to hold the bar nose upward, locking the adjustment in place.
Untangling Bound Blades in Heavy Brush, Vines, and Forestry Overgrowth
Untangling challenges in outdoor power equipment are not limited to traditional chainsaw loops; circular chainsaw-tooth clearing blades can also become tangled when operating in thick underbrush. When clearing honeysuckle vines, wild grapevines, or dense briars, flexible vegetation frequently wraps tightly behind the blade adapter and arbor spindle. This rotational binding causes severe clutch slippage, rapid drum overheating, and complete stall of the cutting attachment. Stopping immediately when you feel rotational drag prevents expensive heat damage to the trimmer gearbox and centrifugal clutch pads.
To untangle a bound clearing attachment, shut off the trimmer engine or remove the battery before setting the tool on a firm surface. Use sharp bypass hand pruners to sever the wound vines close to the spindle rather than trying to unwind long runners under tension. Products like the (2-Set) 9″ x 20T Chainsaw Tooth Brush Blades by CalPalmy are built specifically to tackle dense thickets with a dedicated 20-tooth chainsaw cutting perimeter. The listed specifications indicate an arbor size of 1 inch alongside included 20mm and 25mm washers, engineered for straight shaft trimmers operating at speeds up to 10,000 RPM.
Inspecting the mounting hardware after clearing bound brush ensures that wrapped wire, fencing remnants, or fibrous stems have not compromised the thrust washers. Tangled vines can force dirt into the gearbox seal or push the blade off its centering collar, causing severe vibration during acceleration. Confirm that the blade rests perfectly centered against the arbor shoulder before retorquing the arbor nut with the correct left-hand thread rotation. A cleanly cleared spindle and properly seated clearing blade restore full cutting momentum and prevent dangerous vibration fatigue.
Cutter Sharpening and File Matching After Freeing a Snagged Blade
Untangling a thrown saw chain or freeing a bound circular blade often reveals dull, rock-damaged, or abrasive-worn cutting teeth. A chain that struck dirt, stones, or hidden fence wire during a derailment loses its keen edge and will produce fine wood dust rather than crisp rectangular chips. Sharpening restored teeth requires matching the exact round file diameter to the chain pitch to maintain correct working cutter geometry. Using the wrong file diameter alters the hook angle, resulting in either excessive self-feeding or frustratingly slow, scraping performance.
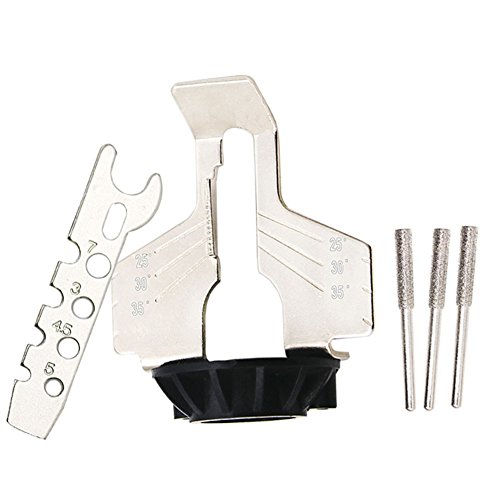
For blades utilizing a .325-inch pitch cutter tooth, a 3/16-inch round file provides the correct radius for establishing sharp, consistent side and top-plate cutting angles. The CalPalmy weed eater saw blade kit includes three precision round files sized at 3/16 inch specifically to maintain .325-inch pitch chainsaw teeth. Mount your file in a rigid filing guide and stroke forward through the cutter gullet from the inside out, maintaining the standard 30-degree filing angle. Count your file strokes on the most severely damaged cutter, then apply that exact count to every tooth to maintain uniform cutter lengths across the entire tool.
After filing all left- and right-hand cutters, verify the depth gauge clearances using a progressive depth gauge filing tool. Depth gauges, or rakers, govern the thickness of the wood chip that each cutter tooth can bite on every pass. If the rakers remain too high, the sharpened teeth cannot penetrate the wood, but if filed too low, the cutters grab aggressively and cause severe kickback hazards. Maintaining balanced cutter teeth and correct raker clearances ensures smooth cutting behavior and minimizes the jerking forces that throw chains off their rails.
Storage Practices and Prevention to Avoid Future Knots and Binding
Preventing chains from tangling in the future begins with establishing structured storage habits in your workshop or transport rig. Instead of dropping loose replacement chains into the bottom of an equipment bag, hang clean spare chains individually from wall-mounted dowels or organized shop pegs. Alternatively, fold each clean loop into a figure-eight, slip a reusable hook-and-loop strap or heavy zip tie around the center waist, and store it in an individual plastic container. Keeping spare loops separated and lightly oiled prevents moisture corrosion and eliminates irritating knots when swapping chains in the field.
When operating circular chainsaw blades or traditional chainsaws in heavy ground cover, adopt proactive cutting techniques to avoid throwing or tangling cutting attachments. Clear away loose ground vines and high grass with a conventional line trimmer head before bringing high-speed chainsaw-tooth attachments into heavy thickets. Check chain tension periodically throughout the cutting day, as metal heat expansion naturally causes new and working chains to loosen and sag along the bottom bar rail. By combining disciplined chain maintenance, correct tensioning practices, and orderly storage routines, you will keep your outdoor power equipment cutting safely, efficiently, and trouble-free.





Write Your Review
No reviews yet. Be the first to share your experience!