


A dull chainsaw chain causes the motor to work harder and produces a ragged cut that frustrates any user. The direct answer to how to sharpen a chainsaw blade with an electric sharpener is to use a guide attachment that locks the grinding tool at the manufacturer’s specified angle. This mechanical setup removes the guesswork of hand filing and ensures every tooth is ground to the same depth and profile.
Many homeowners assume sharpening is a task reserved for professionals, but the right electric kit makes the process accessible for DIY maintenance. By securing a sharpening guide onto your rotary tool or drill, you create a rigid interface that prevents the bit from wandering. This stability is crucial for maintaining the chain’s integrity and ensuring the saw cuts smoothly through wood without kicking back unexpectedly.

The core of this process is mechanical consistency. Unlike hand filing, where muscle memory dictates the angle, an electric sharpener with a guide attachment physically forces the grinding head to stay at a fixed angle relative to the chain. This is vital because a chainsaw chain has two distinct cutting angles: the main cutting angle on the teeth and the raker angle on the depth gauges. Getting these right requires precision that is difficult to achieve by eye, especially on a moving or rotating chain.
| Parameter | Typical Specification | Why It Matters |
|---|---|---|
| Main Cutting Angle | 25-35 degrees | Determines how aggressively the tooth bites into wood. |
| Raker Angle | 90-110 degrees | Controls the depth of the cut and prevents kickback. |
| Grinding Wheel Diameter | Variable | Must match the chain pitch and gauge for proper fit. |
| Guide Angle | Fixed by attachment | Ensures uniformity across all chain links. |
Before starting, you must identify your chain’s specifications. The chain pitch and gauge are stamped on the bar or listed in the manual. These numbers determine which grinding wheel and guide size you need. Using the wrong diameter wheel can lead to uneven cuts or damage to the chain links. Always verify that your electric sharpener kit includes the correct accessories for your specific chain type.
- Verify the chain pitch and gauge match the grinding wheel diameter.
- Ensure the saw is unplugged or the battery is removed before setup.
- Check that the chain is clean and free of pitch or debris.
- Confirm the guide attachment screws securely onto the tool housing.
- Inspect the grinding head for wear or damage before use.
- Secure the saw on a stable workbench or vise for stability.
Setting Up the Electric Guide Attachment
The sharpening guide is the most critical component of this system. It typically screws onto the front of the rotary tool or drill, replacing the standard housing or chuck guard. The guide has a slot or channel that holds the grinding wheel and a bracket that rests against the chain drive link. This physical contact point is what sets the angle. If the guide is loose or the wheel wobbles, the sharpening will be inconsistent and potentially dangerous.
Most electric sharpening guides are designed to be adjustable for different chain pitches. You will often find a screw or pin that changes the position of the wheel relative to the guide body. Set this according to the manufacturer’s chart for your specific chain size. A common mistake is assuming a one-size-fits-all approach, but a 3/8 inch pitch chain requires a different geometry than a 1/4 inch pitch chain. Getting this setup right saves time and ensures a clean cut.
Managing the Raker Depth Gauge
Sharpening the main cutting teeth is only half the job. The depth gauges, or rakers, located between the teeth, must also be managed. As the cutting teeth are ground down, the rakers become relatively taller, which can cause the saw to cut too deep and increase kickback risk. An electric sharpener does not automatically file the rakers, so you must use a separate raker gauge or file for this step. This is a crucial safety check that many DIYers overlook.
After sharpening the teeth, measure the raker height using a dedicated raker gauge. If the raker is higher than the specified limit for your chain model, it must be filed down. Do not use the electric grinding wheel for this task, as it is not designed for the flat surface of the raker. Using the wrong tool can distort the raker shape and compromise the chain’s safety. Always follow the manufacturer’s specifications for raker height, which are typically found in the chainsaw manual or on the chain packaging.
- Measure raker height with a specific gauge, not by eye.
- Never use the electric grinder on the flat raker surface.
- Check rakers after every sharpening session to maintain safety.
- Replace the chain if rakers are worn down to the minimum limit.
Technique for Even Grinding
Once the guide is attached and the angle is set, the actual grinding process requires a steady hand. Rotate the chain slowly so that each tooth comes into contact with the grinding wheel one at a time. Apply light, even pressure and let the high-speed wheel do the work. Forcing the tool against the chain can cause the wheel to grab or the chain to jump, which is a serious safety hazard. The guide prevents the angle from changing, but you are still responsible for the pressure and speed.
Work on each tooth for the same amount of time to ensure uniformity. If you spend too long on one tooth, it will be shorter than its neighbors, causing the chain to run unevenly and vibrate excessively. A good technique is to count the rotations of the chain or use a visual marker to ensure you process every tooth equally. This consistency is what separates a professional-grade sharpening from a rough DIY job. It also helps in detecting if a tooth is damaged or worn out beyond repair.
Common Pitfalls and Safety Checks
One of the most common issues with electric sharpening is overheating the chain. High-speed grinding generates significant friction and heat, which can temper the steel and weaken the teeth. To prevent this, use a light touch and frequent breaks. If the chain feels hot to the touch, stop and let it cool down. Overheating can also cause the lubrication to burn off, leaving the chain dry and prone to rust. Always re-lubricate the chain after sharpening to protect the new edges.
Safety is paramount when working with a chainsaw, even when it is not running. The chain can still move if the brake is not engaged, and the grinding wheel is a high-speed rotating object. Wear safety glasses to protect your eyes from flying metal chips and dust.
Use a sturdy vise to hold the saw bar securely, as the forces involved can twist the bar if it is not clamped properly. Never stand in line with the chain, as a sudden grab could fling the bar. Follow all manufacturer safety guidelines for chainsaw maintenance and tool use.
If you are looking for a simpler alternative for minor touch-ups, a manual file might be more suitable for occasional users. However, for frequent sharpening or professional work, the consistency of an electric sharpener with a guide is hard to beat.
For those interested in other blade maintenance tasks, our guide on filing lawn mower blades offers similar principles for different tools. The key takeaway is that precision and consistency are the foundations of effective sharpening, whether for a chainsaw or a mower. Always prioritize safety and proper setup to get the best results from your equipment.

Mower Blade Zoryx of 2026
Check mower blade zoryx fit and steel specs in November 2026. Compare high-lift and mulching profiles for clean cuts and less deck clumping.

Can You Sharpen Lawn Mower Blades: Practical Guide for 2026
Can you sharpen lawn mower blades at home? Learn safe sharpening methods, balancing steps, and key tool options in this November 2026 guide.

What to Add to Gas for Lawn Mower: Clear Answer
What To Add To Gas For Lawn Mower involves adding stabilizer to prevent fuel degradation. Learn the November 2026 guide on ratios, storage safety, and maintenance tips for your equipment.

Do You Sharpen Lawn Mower Blades: Practical Guide for 2026
Learn why and when do you sharpen lawn mower blades to protect grass health and cutting efficiency in this November 2026 guide.
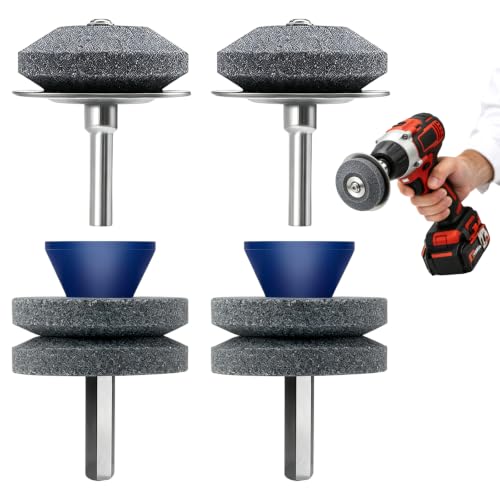
How Do You Sharpen a Mulching Lawn Mower Blade: Practical Guide for 2026
Explore how do you sharpen a mulching lawn mower blade for November 2026 to maintain curved cutting edges, ensure proper balance, and achieve clean grass cuts.

Are Lawn Mower Blade Bolts Reverse: Practical Direction & Hardware Guide for 2026
Wondering are lawn mower blade bolts reverse before servicing your deck? Learn thread directions, common exceptions, and replacement hardware tips for November 2026.

Lawn Mower Blade Spindle of 2026
Find the right lawn mower blade spindle for your deck in November 2026. Check fitment, specs, and user feedback to ensure smooth operation and prevent damage.

Briggs Mower Blade of 2026
Compare 6 briggs mower blade options for November 2026. Check center hole fit, steel gauge, and lift profile to stop deck vibration and torn grass tips before you buy.

How Often Change Lawn Mower Blade: Practical Guide for 2026
Learn how often change lawn mower blade schedules matter for clean turf, safe cutting, and yard care upkeep in November 2026.
How to Remove a Lawnmower Blade: A Practical Guide for 2026
Learn how to remove a lawnmower blade safely with proper locking tools, correct wrench technique, and maintenance tips updated for November 2026.
Write Your Review
No reviews yet. Be the first to share your experience!