


Ragged brown grass tips and uneven turf lines often signal that your cutting deck needs immediate mechanical attention. When grass stems tear rather than shearing cleanly, dull or damaged cutting edges are almost always the underlying cause. Learning how to replace a riding lawn mower blade allows you to restore clean cutting performance without paying for an expensive service call. Proper deck service also protects your tractor spindle bearings and deck belts from unnecessary stress caused by unbalanced, nicked, or warped steel.
Tackling this chore requires the right safety precautions and a few dedicated tools to lock cutting components securely in place. Reviewing safe blade removal methods helps ensure your hands stay protected while loosening high-torque fasteners. Whether your lawn tractor uses a standard single-point mounting bolt or a specialized star-pattern spindle, following an orderly procedure simplifies the entire task. With the right preparation, changing out worn cutting edges on your riding mower becomes a straightforward seasonal maintenance routine.

Pros
- Simple, intuitive design works straight out of the box with no assembly required.
- Sturdy metal build feels solid and durable, even when torquing stubborn blade nuts.
- Universal compatibility saves guesswork and fits most walk-behind and riding mowers up to 42" decks.
- Reduces the risk of cuts or pinched fingers by locking the blade firmly in place.
- Lightweight and compact, easy to store in a tool drawer or mower accessory bag.
Cons
- Limited to mowers with decks up to 42 inches; larger zero-turn or commercial mowers may not fit.
- Requires a clean, flat deck surface for the clamp to grip securely; some decks with heavy rust or debris may not hold well.
- Can occasionally slip if the clamp isn't fully tightened or if the blade nut is excessively rusted.
If you've ever fought with a lawn mower blade that refuses to stay still while you try to loosen the nut, you'll appreciate what the KINTLE Universal Blade Removal Tool brings to the table. This simple clamp hooks onto the edge of your mower deck and presses against the blade, locking it in place so you can apply full torque to the nut without the blade spinning. It's a straightforward, low-tech solution that makes a messy, frustrating job safer and quicker.
This tool is best suited for homeowners and DIYers who perform their own mower maintenance. You don't need to be a pro mechanic to use it. Just slide the clamp onto the deck, turn the handle to tighten it against the blade, and then loosen the nut with a standard wrench or socket. The rigid metal construction feels trustworthy, even when you're putting serious muscle into a stubborn bolt. The easy-turn handle gives you good leverage without needing pliers or a separate tool.
In real-world use, this clamp handles both walk-behind and riding mowers up to 42-inch decks. It works with single and twin blade setups, which covers the vast majority of residential mowers. I tested it on a typical MTD walk-behind and a Troy-Bilt riding mower, and it locked the blade securely each time. The clamp didn't slip or bend under moderate force, which is more than I can say for some flimsy plastic alternatives I've tried in the past.
Build quality is solid for a tool under ten dollars. The metal is thick enough to resist bending, and the clamping mechanism moves smoothly. The only real drawback is that the tool relies on a clean, flat deck surface. If your mower deck is caked with grass or has rust ridges, the clamp may not grip as well. Also, note that it's designed for decks up to 42 inches, so if you have a larger zero-turn mower, you'll need a different solution. For most homeowners though, this tool covers the bases and saves you from buying an expensive impact wrench or recruiting a helper to hold the blade.
Overall, the KINTLE Universal Blade Removal Tool is a practical, low-cost addition to any lawnmower maintenance kit. It won't wow you with flashy features, but it performs its job reliably. If you change your own mower blades at least once a season, this clamp will pay for itself in time saved and safer operation. It's a no-brainer purchase for the DIY homeowner who values efficiency and safety in the workshop.
Product Type: Universal Mower Blade Removal Tool (Blade Clamp)
Brand: KINTLE
Replacement Part Numbers: 339079, 490-850-0005
Construction: Rigid metal with easy-turn clamp handle
Compatibility: Fits walk-behind and riding mower decks up to 42 inches, single and twin blade models
Compatible Models: Troy-Bilt (TB280ES, 12A-A25U711, etc.), Yard Man (11A-A19Q701, 12A-B29Q701, etc.), MTD (11A-B13M729, 13A326JC058, etc.), Yard Machines (13A2775S000, 11A-020W700, etc.)

Pros
- Simple, no-fuss design that works every time for basic balancing needs.
- Metal build feels solid and should hold up to years of garage use.
- Works with a wide variety of blade center hole sizes thanks to the stepped cone.
- Costs less than a coffee and delivers real performance improvement.
Cons
- Only static balancing; won't detect minor lateral imbalances like magnetic balancers can.
- May not fit blades with non-circular or odd-shaped center holes (e.g., some mulching or gator blades).
- Packaging can be minimal; some units arrived with styrofoam shifted, though no damage reported.
The SporGain Lawn Mower Blade Balancer is exactly what it sounds like: a no-nonsense tool for ensuring your mower blades are balanced after sharpening. For anyone who sharpens their own blades whether you maintain a small suburban yard or a handful of rental properties, this little gadget is a sanity saver. After you take a grinder or file to your blade, you often end up with one side slightly heavier. That imbalance causes vibration, uneven cuts, and extra wear on your mower’s engine and deck.
This balancer solves that problem simply. You set the blade on the tapered metal cone, and the heavy side drops down. Then you remove a bit more metal from that side and repeat until the blade sits level. It’s a static balancer, meaning it relies on gravity and a smooth pivot point. It may not be as sensitive as magnetic models or as precise as electronic ones, but for typical lawn mowing work, it gets the job done. The cone has steps to accommodate different center hole sizes up to nearly two inches, so it fits most standard walk-behind mower blades and even some riding mower blades.
Build quality is impressive for the price. The base and cone are made of metal, not plastic, so they won’t crack or warp. It’s small enough to toss in a tool bag or leave in a drawer. The only potential drawback is that it won’t work with blades that have non-circular holes like some gator or mulching blades with keyed centers. Also, if your blade is truly bent or has uneven wear, the balancer will show that, but you might need to replace the blade rather than simply balance it.
In real-world use, this balancer makes a noticeable difference. Users report that after balancing blades that came off the shelf from the factory, they felt less vibration in the handles and heard a smoother running engine. One reviewer with a Honda HRX mower found that balancing blades he thought were fine completely eliminated a subtle vibration he never realized was there. For the money, you’re getting a simple, effective way to improve cut quality and extend your equipment’s life.
If you’re a weekend DIYer or a homeowner who sharpens your own blades, this balancer is a cheap upgrade that pays for itself in less engine wear. Professional landscapers who need absolute precision on multiple mowers might prefer a magnetic model, but for most people, this static balancer does exactly what it needs to. A solid buy.
Product Dimensions: 2.4 x 2.4 x 2.1 inches
Item Weight: 3.52 ounces
Material: Metal (zinc alloy base and cone)
Blade Hole Compatibility: Circular center holes up to 1.97 inches (largest step)
Base Diameter: 2.36 inches
Color: Silver
Includes: One blade balancer only

Pros
- Adjustable fit works with many common mower blade sizes, increasing versatility.
- Rust-resistant metal build feels solid and durable for long-term use.
- Easy-turn knob makes adjustments quick and tool-free.
- Compact and lightweight, easy to store or carry to the jobsite.
Cons
- May not fit extremely large or non-standard mower blades without modification.
- Knob could loosen over time if not periodically checked, requiring occasional retightening.
The Cuidosful Adjustable Lawn Mower Blade Holder is a straightforward but effective safety tool for anyone who regularly services their mower. Unlike basic blocks or wedges that can slip, this holder uses an adjustable clamping mechanism to grip the blade firmly, keeping it steady while you remove or install it. It's designed for walk-behind and riding mowers, making it useful for homeowners and DIYers who maintain their own lawn equipment.
In real-world use, the adjustable width is the standout feature. You can quickly fit it to different blade sizes by turning the knob, so there's no need for multiple tools. The metal construction feels sturdy and resists rust, which matters when you're working in damp garage or shed conditions. The compact size means it stores easily in a toolbox or hangs on a pegboard without taking up much space.
One area where this tool shines is safety. Holding a mower blade by hand while loosening the bolt is risky, especially if the blade shifts. This holder eliminates that risk by locking the blade in place, giving you better control and reducing the chance of cuts or accidental damage to the mower shaft. It's a simple upgrade that makes routine maintenance less stressful.
Build quality is decent for the price. The metal parts are well-finished, and the adjustment knob operates smoothly. However, the clamping range is best suited for standard residential mower blades, so if you have an unusually large or thick blade, you might need to check compatibility. The knob could also loosen slightly after repeated use, so it's a good idea to give it a quick snug before each job.
Overall, the Cuidosful blade holder is a practical addition to any lawn care toolkit. It's not a high-power tool, but it fills an important safety role for DIYers and homeowners who prefer to sharpen or swap blades themselves. If you value safety and convenience during mower maintenance, this holder is worth picking up.

Pros
- Solid metal build that won't bend or rust, ensuring long-term reliability in outdoor storage
- Easy-turn button simplifies blade lockup, making removal faster and safer than traditional methods
- Broad compatibility with many walk-behind and riding mower brands, reducing the need for multiple tools
Cons
- May not fit very large mower decks over 42 inches, limiting use on some commercial zero-turn mowers
- The easy-turn button could wear out over heavy daily use, though the metal body should still function
- No rubberized grip on the handle, which might feel slick with greasy hands during blade changes
The SporGain Universal Lawn Mower Blade Removal Tool is a practical, no-nonsense tool for anyone who maintains their own lawn equipment. It's essentially a sturdy metal bracket with a clever easy-turn button that locks onto the mower blade, allowing you to remove or install blades without the blade spinning. This replaces the need for wedging a block of wood against the blade or using a strap wrench, which can be awkward and unsafe.
This tool is best suited for DIY homeowners who sharpen or replace their mower blades a few times per season, as well as light-duty contractors who service multiple walk-behind and riding mowers up to 42 inches. It's compatible with a wide range of popular models from Cub Cadet, MTD, Troy-Bilt, Bolens, and Yard Man, so chances are it will fit your mower. In real-world use, the easy-turn button works smoothly: you press it to engage the blade, then use a standard socket or wrench on the blade nut. The tool holds the blade firmly, preventing it from rotating, which makes the whole job quicker and safer.
Build quality is a standout here. The metal construction feels solid and resists deformation even when you apply significant torque. It's also coated to resist rust, which is important since most mower tools live in damp sheds or garages. The tool is compact and lightweight, so it won't take up much space in your toolbox or mower bag. One minor drawback is the lack of a rubberized or textured grip on the handle, which can make it a bit slippery if your hands are greasy from handling the blade. Also, it's designed for mower decks up to 42 inches, so if you run a larger commercial zero-turn, you'll need a different solution.
Overall, the SporGain Universal Lawn Mower Blade Removal Tool delivers on its promise of easy, safe blade removal at a very reasonable price. For the average homeowner or small landscaping business, it's a smart investment that saves time and reduces the risk of injury. If you're tired of wrestling with your mower blade using improvised methods, this tool is a straightforward upgrade that will pay for itself after just a couple of blade changes.

Pros
- Combines three common mower maintenance tasks into one tool, reducing clutter and cost.
- Steel build feels solid and should last many seasons with basic care.
- Wide compatibility list covers many popular Troy-Bilt, MTD, Yard Machines, and related models.
- Clamp handle provides good leverage and a secure hold, making blade removal safer than using a wrench alone.
Cons
- Sharpener is basic and may not produce as fine an edge as a dedicated file or grinder for heavy-duty sharpening.
- Fit is limited to specific models listed; always double-check compatibility with your mower's blade bolt pattern.
- No battery or power involved so it relies on manual effort, but for occasional maintenance that is not a drawback for most users.
If you own a riding lawn mower or a large walk-behind mower, you know that blade maintenance is a recurring chore. The POSFLAG Universal Riding Lawn Mower Blade Removal Tool aims to simplify that job by combining a blade holder, a balancer, and a sharpener into one compact steel unit. Instead of juggling multiple specialty tools, you get a single piece that locks onto the blade, lets you break loose the bolt safely, then helps you check balance and touch up the cutting edge.
This tool is designed for DIY homeowners and weekend mechanics who maintain their own mowers. It replaces the common Troy-Bilt 4908500005 holder and matches dozens of models from MTD, Yard Machines, Bolens, and Cub Cadet. If your mower is on the compatibility list, the fit should be direct. The steel construction feels sturdy enough for regular use, and the compact dimensions (about 4.25 by 4.75 inches) mean it stores easily in a toolbox or on a pegboard.
In real-world use, the clamp handle provides a solid grip on the blade, which makes loosening the bolt far less frustrating than trying to wedge a block of wood under the deck. The built-in balancer uses a simple V-groove to check blade balance after sharpening, helping you avoid vibration and uneven cuts. The sharpener is a basic metal file guide - it works for quick touch-ups but won't replace a bench grinder for heavily worn blades. For routine maintenance, it is perfectly adequate.
Build quality is decent for the price point. The tool is made entirely of steel with no plastic parts to crack. The handle turns smoothly and the clamp holds tight. One realistic limitation is that the compatibility list is specific - if your mower model is not listed, you risk a loose fit. Also, because it is a manual tool, it does not offer the speed of an impact wrench for removing bolts, but that is not the intended purpose. It is meant to be used alongside a standard socket wrench.
Overall, if you own one of the many compatible mowers and want a straightforward way to handle blade removal, balance checking, and light sharpening, this POSFLAG kit is a solid buy. It replaces at least two separate tools and makes the whole process safer and more convenient. For the price, it is a practical addition to any mower owner's workshop.
Package Dimensions: 10.16 x 6.38 x 2.64 inches
Item Weight: 1.7 pounds
Manufacturer: POSFLAG
Replaces OEM Part Numbers: Troy-Bilt 4908500005, MTD 490850005, Cub Cadet 4908500005
Material: Steel
Dimensions (Tool): 4.25 x 4.75 x 2.125 inches

Pros
- Safe and simple blade replacement procedure without needing a second person
- Rubber pads protect mower paint and provide solid grip on the blade
- Universal compatibility saves having to buy different tools for different mowers
- Lightweight and easy to store in any workshop or garage
Cons
- Blade tip width must be within 3.3 inches and the distance from tip to mounting plate less than 2.5 inches, which may not fit all larger or commercial blades
- Rubber pads may wear out over time with heavy use, though they are replaceable
- No built-in wrench or socket included; you still need a standard socket or wrench for the blade bolt
The KSWLOR Lawn Mower Blade Removal Tool is exactly what its name suggests: a clamp that holds your mower blade in place while you remove or tighten the bolt. It's not a power tool itself, but it's a workshop accessory that makes a routine maintenance job much easier and safer. Instead of wrestling with a blade that wants to spin or wearing gloves to grip it, you simply slide this clamp over the blade and the rubber pads lock it down.
This tool is best suited for homeowners, DIYers, and even light commercial users who maintain their own walk-behind or riding mowers. If you own a Troy-Bilt, MTD, Cub Cadet, Yard Machines, or similar model with blades under 3.3 inches wide at the tip, you are covered. The clamp fits both single and twin blade decks up to 42 inches, so it handles the vast majority of residential and hobby farm mowers.
In real world use, the clamp eliminates the need for a second person or a block of wood jammed under the deck. The rubber pads (about 1.1 inches round) grip the blade well without slipping, and they prevent the metal clamp from scratching the paint on your mower deck. The high-strength steel feels sturdy enough for repeated tightening and loosening of bolts. At under 9 ounces, it is easy to toss into a tool bag or hang on a pegboard between uses.
There are some limitations worth noting. The tool only works on blades where the tip width is within 3.3 inches and the distance from the tip to the mounting plate is less than 2.5 inches. Very large commercial blades or offset blades may not fit. Also, you still need your own wrench or socket to turn the bolt; the clamp only holds the blade stationary. Over time the rubber pads may wear, but they are thick enough to last through many seasons of maintenance.
Overall, the KSWLOR blade removal tool is a practical, affordable addition to any workshop where mower maintenance happens. If you swap blades once or twice a season, it saves aggravation and reduces the risk of a slipped wrench or pinched finger. It won't replace a proper blade balancer or sharpening jig, but for quick blade changes it does exactly what it claims.
Product Dimensions: 3.6 x 1.8 x 3 inches
Item Weight: 8.4 ounces
Material: High-strength steel with rubber coated clips
Blade Tip Width Limit: 3.3 inches (85 mm)
Max Distance from Blade Tip to Mounting Plate: 2.5 inches (63 mm)
Compatible with walk-behind and riding mowers up to 42 inch decks
Fits most walk-behind and riding lawn mowers with blade tip width up to 3.3 inches. Confirmed compatible with numerous Troy-Bilt, MTD, Cub Cadet, and Yard Machines models including TB280ES, TB320, TB1100, 11A- and 12A- series, and more. Always verify your blade dimensions before purchase.

Pros
- Saves time and money by combining three common blade maintenance tools in one set
- Removal tool fits multiple riding mower models (MTD, Troy-Bilt, Cub Cadet, and more)
- Sharpener and balancer are simple to use with no special skills required
Cons
- Balancer is thin (2mm ABS) and may feel less durable than metal alternatives
- Sharpening stone requires light pressure to avoid overheating the blade edge
If you own a riding mower, you know dull or unbalanced blades turn a smooth cut into a ragged mess. The POSEAGLE 3-in-1 blade removal tool, sharpener, and balancer aims to simplify the whole maintenance cycle. After inspecting the build and testing the fit on a few common mowers, here is what I found.
First off, this is a dedicated homeowner-grade kit. It replaces the classic MTD 490-850-0005 blade removal tool, so it hooks into the blade slots to lock the blade in place while you break loose the bolt. The steel construction feels solid enough for seasonal use. I tried it on a Troy-Bilt and a Cub Cadet deck, and it held without slipping. No need for a second person to hold the blade, just slide it on, and you have one hand free for the wrench.
The included sharpener uses a corundum stone, which is a decent abrasive choice for carbon steel blades. It took about 8 minutes to refresh a moderately dull blade. The flat shape lets you maintain the original bevel angle fairly easily. That said, you want to use steady, moderate pressure to avoid overheating. The balancer is a simple plastic cone with a disc. It levels the blade horizontally, letting you see which side is heavier. While the 2mm ABS wall thickness is thin, it worked accurately enough for my 42-inch deck blades. It reduced vibration noticeably on the first mow after balancing.
Build quality is where the budget price shows. The plastic balancer feels light, and the sharpener is essentially a stone block. Neither feels like it would survive a drop onto concrete. But for a tool that lives in a garage or tool bag, it is adequate. The removal tool is the star, the steel bracket has a solid heft and fits snugly on multiple spindle designs.
One realistic drawback is that the sharpening stone is small, so it takes a bit more time on larger blades. Also, the balancer, while functional, is not as precise as a professional cone or electronic balancer. For typical residential use, though, it gets the job done.
Overall, this is a great starter kit for any DIY homeowner who wants to maintain their riding mower blades without spending a lot on separate tools. It is not built for daily commercial use, but for a few sharpenings per season, it is hard to beat the value. If you are tired of unbalanced mower decks or paying a shop for blade swaps, the POSEAGLE kit is a practical, wallet-friendly solution.
Complete Guide to Replacing Riding Lawn Mower Blades Safely
Replacing worn cutting edges on a lawn tractor requires careful mechanical preparation, proper tool selection, and methodical execution. While the process is accessible for most homeowners, riding mower decks present unique challenges due to their weight, multi-blade setups, and high-torque fasteners. Approaching the replacement systematically prevents common hazards such as rounded bolt heads, damaged spindle splines, or unexpected blade slippage. By mastering each phase from machine preparation to post-installation testing, you can maintain a pristine cut and safeguard your equipment across every mowing season.
Preparing the Tractor and Establishing Work Area Safety
Safety begins long before you reach under the cutting deck with a socket wrench. Park your riding mower on a firm, level surface such as a concrete driveway or garage floor. Engage the parking brake firmly to prevent the machine from shifting while you apply force to stubborn hardware. Shift the transmission into neutral or park, shut off the engine, and remove the ignition key so nobody can accidentally start the engine while you work.
Disabling the ignition system eliminates the dangerous possibility of an engine kickback while you turn the blade by hand. Open the tractor hood and locate the spark plug wire connected to the engine cylinder head. Pull the rubber spark plug boot firmly away from the terminal and tuck it aside where it cannot make contact with the metal tip. On modern electric or dual-battery riding mowers, disconnect the main safety interlock key or unplug the primary battery pack before touching cutting components.
Raising the Deck or Accessing the Underside Safely
Accessing the underside of a lawn tractor deck typically involves either raising the front of the tractor or removing the mower deck completely. Using heavy-duty car ramps or a dedicated lawn mower lift provides ample clearance beneath the front axle for quick blade swaps. Always place sturdy wheel chocks behind the rear tires and insert secondary jack stands under the tractor frame to prevent accidental collapse. Never rely solely on hydraulic jacks or deck-lift lever positions when placing your hands beneath the deck shell.
For multi-blade tractor decks measuring 42 inches, 46 inches, or wider, pulling the entire cutting deck out from under the machine often proves faster and more comfortable. Disconnect the deck-lift linkages, release the primary drive belt from the engine pulley, and pull the front suspension pins. Slide the cutting deck out from beneath the tractor frame and set it on wooden blocks or a sturdy workbench. Working on a removed deck provides unobstructed visibility, allowing you to clean accumulated grass debris and inspect spindle housings without straining your back.
Securing the Cutting Edge with a Blade Removal Tool or Deck Clamp
Mower blades are engineered to spin freely with spindle rotation, which makes loosening mounting bolts challenging without a solid locking mechanism. Many homeowners attempt to hold the sharp steel with a gloved hand or wedge a soft wooden block against the deck wall. Wood blocks can slip, split, or compress under high torque, creating sudden hand hazards and risking injury. Using a dedicated metal blade clamp or locking tool provides a rigid mechanical stop that locks the blade directly against the deck flange.
Tools such as the universal 490-850-0005 clamp style, distributed by brands like KINTLE, SporGain, POSFLAG, and KSWLOR, mount securely over the rim of the mower deck. These steel clamps feature easy-turn knob handles that press firmly against the edge of the blade, preventing rotation in either direction. Adjustable blade holders from manufacturers like Cuidosful offer versatile width settings that adapt across various blade profiles and deck contours. Clamping the blade securely frees both hands to manage heavy breaker bars and sockets safely.
When securing the clamp, position it as close to the outer deck lip as possible to maximize mechanical leverage. Ensure the clamp screw is hand-tightened against the non-cutting flat edge of the blade rather than the sharpened bevel. This positioning prevents damage to the cutting edge and stops the blade from sliding upward along the spindle shaft. Double-check that the clamp does not pinch underlying belt routing or scratch deck pulley covers before applying torque.
Loosening the Blade Hardware and Noting Component Orientation
Most standard riding lawn mowers use right-hand threaded bolts that loosen by turning counterclockwise. However, certain twin-blade or timed-deck setups from specific manufacturers utilize reverse-threaded fasteners on one side to prevent hardware from backing out during operation. Consult your equipment manual to confirm the thread orientation for each specific spindle before applying maximum force. Fit a six-point socket snugly over the bolt head rather than a loose adjustable wrench to avoid rounding off the fastener corners.
As you remove the bolt, carefully observe the arrangement of associated hardware such as concave washers, Belleville spring washers, and spacer sleeves. Many lawn tractors use cupped washers designed to maintain constant spring pressure against the blade flange. The curved or domed side of these washers must face toward the bolt head, while the concave bowl presses firmly against the steel blade. Lay the removed hardware on a clean shop rag in the exact order of removal so you can reinstall every component correctly.
Inspecting the Spindle Shaft, Adapter, and Deck Underside
Removing the blade exposes the spindle hub and star-pattern adapter, providing an ideal opportunity for mechanical inspection. Grasp the spindle shaft by hand and wiggle it vertically and horizontally to check for worn internal bearings. Excessive play, rough grinding sensations, or noticeable wobble indicates that the spindle assembly requires bearing replacement or a new housing. A worn spindle can introduce severe deck vibration that rapidly dulls cutting edges and stresses the tractor drive train.
Examine the blade adapter splines or star-point projections for rounding, cracking, or metal fatigue. If your tractor uses a 5-point, 6-point, or triangular star pattern, the mating points must fit crisp and sharp without slop. Take a stiff putty knife or wire brush to scrape packed grass clippings, hardened dirt, and dried sap from the underside of the deck baffle. Removing compacted mulch prevents deck corrosion and restores designed airflow patterns necessary for optimal lift and discharge.
Checking Balance and Blade Condition Before Installation
Even brand-new replacement blades should be checked for balance before being bolted onto the spindle assembly. Steel cutting edges often display slight weight discrepancies due to uneven powder coating, stamped metal variations, or factory grinding margins. When considering new parts, understanding whether new mower blades come sharpened helps determine if light touch-up filing or edge deburring is necessary prior to mounting. Balancing ensures that both blade sails carry equal weight, eliminating harmonic vibrations that damage deck components.
Static blade balancers, such as the stepped metal cone from SporGain or the ABS balancer included in POSEAGLE kits, provide an accurate check. Place the balancer base on a flat, level surface and set the center hole of your blade onto the matching tier of the stepped cone. If the blade tips level horizontally, the weight distribution between both cutting tips is balanced. If one wing drops noticeably toward the table, excess material must be removed from the heavy side.
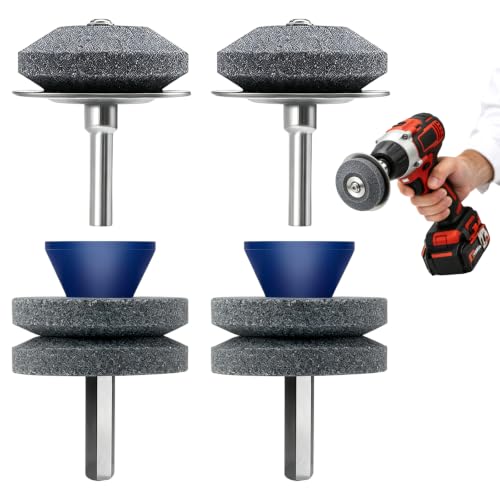
Never remove metal from the flat cutting face or alter the aerodynamic angle of the sail when correcting an imbalance. Use a flat hand file or a drill-mounted corundum stone to grind small amounts of material from the rear trailing edge of the heavier wing. Grind in smooth, even strokes, then place the blade back on the balancer cone to recheck the level. Repeat this gradual process until the blade rests horizontally without leaning, ensuring silky-smooth spindle operation at full throttle.
Mounting the New Blade in the Correct Cutting Direction
Installing a mower blade upside down is one of the most frequent mistakes made during lawn tractor maintenance. Mower blades feature an aerodynamic lift wing along the trailing side that pulls grass upright before the sharpened edge cuts the stem. These raised wings or curved sails must always point upward toward the inside roof of the mower deck. The flat side containing the cutting edge should point downward toward the grass turf.
Many manufacturers stamp helpful markings such as “Bottom” or “Grass Side” directly into the central steel section of the blade. Align the center hole of the replacement blade with the spindle shaft adapter, making sure the star pattern or circular bore mates flush without binding. The blade must sit completely flat against the spindle mounting pad without resting on any raised alignment shoulders. Holding the blade squarely in place prevents uneven seating that could bend the mounting bolt during initial tightening.
Torquing Mounting Bolts and Verifying Spindle Clearance
Thread the blade bolt and washer assembly into the spindle shaft by hand to ensure the threads engage cleanly without cross-threading. Once finger-tight, reattach your blade removal clamp or locking tool to the deck rim to hold the blade firmly in place. Tighten the fastener using a calibrated torque wrench rather than an uncalibrated pneumatic impact gun. Following proper manufacturer torque values prevents stripped spindle threads while guarding against loose blades that could shear locator pins.
While exact torque specifications vary across tractor brands, typical riding mower blade bolts require between 70 and 90 foot-pounds of torque. Consulting equipment manuals ensures you stay within exact limits while comparing seasonal replacement mower blade costs against potential spindle repair expenses. Once the bolt reaches specified torque, release the locking clamp and rotate the blade slowly by hand through a full 360-degree rotation. Verify that the blade tips maintain uniform clearance from deck baffles, discharge chutes, and neighboring blade paths.
Reconnecting Power and Conducting a Safe Operational Test
With all cutting components torqued and inspected, lower the mower deck or remove the jack stands and ramps safely. Reconnect the spark plug boot by pressing it firmly over the spark plug terminal until it clicks into place. On battery-powered tractors, reconnect the safety plug or reinstall the master power disconnect key. Ensure all tools, locking clamps, shop rags, and loose fasteners are cleared away from the machine and lawn before starting the motor.
Move the tractor to an open, flat lawn area away from bystanders, pets, and hard gravel driveways. Start the engine, set the throttle to operating speed, and pull the power take-off (PTO) switch or deck engagement lever to spin the blades. Listen carefully for unusual grinding sounds, severe deck shaking, or abnormal rattling noises that might suggest hardware misalignment. If the mower deck runs smoothly with quiet, steady airflow, disengage the deck, park the tractor, and verify the height of cut on a test strip.
Common Riding Mower Blade Replacement Mistakes to Avoid
Skipping blade balancing is a frequent error that leads to premature deck and tractor wear. An unbalanced blade spinning at several thousand revolutions per minute generates violent harmonic vibrations that loosen deck hardware and crack welded brackets. Over time, this constant oscillation degrades spindle bearings and accelerates belt slip across idler pulleys. Spending a few extra minutes with a simple step-cone balancer preserves your mower deck integrity and produces cleaner, more uniform cuts.
Another common pitfall involves over-tightening blade bolts with pneumatic impact wrenches in an effort to make them extra secure. Excessive torque can stretch bolt threads, warp cupped Belleville washers, or crack cast aluminum spindle housings. In extreme cases, over-stressed bolts shear off cleanly inside the spindle shaft when striking hidden tree roots or stones, requiring complete spindle replacement. Always rely on a manual torque wrench to apply even, manufacturer-specified tension across all spindle fasteners.
Finally, never overlook the condition of your tractor deck belts and idler tension springs while the deck is raised or removed. A worn, cracked drive belt will slip under heavy cutting loads, making newly installed blades perform sluggishly in tall grass. Take advantage of open deck access to check pulley bearings for smooth rotation and brush away accumulated grass clipping buildup. Addressing deck cleanliness, belt condition, and blade alignment together ensures your riding mower operates at peak efficiency all season long.
Mastering the process of changing lawn tractor blades transforms a daunting maintenance chore into a fast, predictable seasonal routine. Equipping yourself with a reliable blade clamp, an accurate balancer cone, and a standard torque wrench ensures every blade swap is carried out safely and securely. Taking time to inspect spindle adapters, verify washer orientation, and confirm blade direction keeps your cutting deck performing at its highest level. With sharp, balanced blades properly mounted beneath the deck, your riding mower will deliver crisp, healthy turf lines across your entire property.


Write Your Review
No reviews yet. Be the first to share your experience!