


Bucking dense hardwood logs quickly produces fine powdery dust instead of thick wooden chips when the cutting teeth lose their keen factory edge. Forcing a dull chain through timber increases physical strain on the operator, overheats the guide bar rails, and wastes fuel on overworked two-stroke chainsaw engines. Learning exactly how to file chainsaw blade components restores aggressive cutting efficiency, balances bar wear, and prevents dangerous kickback situations in the woods. Routine maintenance with matched sharpening tools keeps the cutting system tracking straight through fallen trunks and heavy firewood rounds.
Proper chain sharpening requires precise alignment between the cutting tooth top plate, the working corner, and the depth gauge rakers. Using the right round file diameter or diamond rotary burr prevents improper gullet shaping and maintains the designed cutting angle across every link. Modern field kits and rotary attachments make tooth touch-ups practical on the tailgate or directly on the stump. Regular attention to saw chain cutter geometry preserves your equipment investment and ensures clean, rapid chip ejection during demanding property cleanup.

Practical Field Guide to Filing Chainsaw Blades
Directly maintaining a sharp cutting chain is the single most effective way to maximize cutting speed, reduce engine strain, and ensure operator safety. Understanding how to file chainsaw blade components involves mastering three primary variables: matching the file diameter to chain pitch, holding consistent cutter angles, and lowering depth gauges systematically. Skipping regular maintenance forces the engine to run hotter, accelerates guide bar rail wear, and dramatically increases the risk of rotational kickback. With the proper mechanical sequence and appropriate shop tools, restoring factory-sharp cutting geometry takes only minutes on the workbench or out in the field.
Anatomy of Saw Chain Cutters and Depth Gauges
Every saw chain loop consists of drive links, tie straps, and specialized cutting teeth that work sequentially as miniature wood chisels. The cutting tooth features a top plate, a curved side plate, an angled working corner, and an open curved space beneath called the gullet. When the chain travels along the guide bar at high velocity, the razor-sharp working corner severs the wood grain while the top plate lifts the severed chip out of the cut. If either the top plate or the side plate becomes rounded from contact with dirt or abrasive bark, the tooth rubs against the timber rather than slicing through cleanly.
Directly in front of each cutting tooth sits a rounded metal protrusion known as the depth gauge or raker. The depth gauge regulates exactly how deep the cutting tooth corner penetrates the timber on each revolution. If the raker is too high, the cutter cannot bite into the log, causing the saw to bounce and spit fine dust without advancing. When the depth gauge is filed too low, the cutting tooth bites too aggressively into the wood fiber, producing severe engine bogging, harsh chatter, and dangerous kickback hazards. Maintaining proper harmony between cutter tooth length and depth gauge height is essential for smooth bucking operations.
Selecting the Correct File Diameter and Pitch Compatibility
Chainsaw files are precision cutting instruments engineered specifically to shape the hardened chrome plating on saw chain cutters. Dedicated chainsaw files feature uniform spiral fluting designed to remove metal cleanly while creating the exact concave radius required inside the tooth gullet. Chain pitch dictates the precise file diameter required for routine maintenance. Matching the file diameter incorrectly alters the side plate cutting angle, ruining cutting performance even if the tooth appears sharp to the naked eye. Using an undersized file creates an aggressive hook that dulls rapidly, while an oversized file produces a shallow back-slope that cannot bite into hardwood.
Low-profile 3/8-inch pitch chains and 1/4-inch pitch pole saw chains generally require a 5/32-inch (4.0 mm) round file. Mid-sized chains running a .325-inch pitch typically mandate a 3/16-inch (4.8 mm) round file to achieve the proper undercut beneath the top plate. Heavy-duty standard 3/8-inch pitch professional chains generally specify a 7/32-inch (5.5 mm) file, while certain specialized chains utilize 13/64-inch (5.2 mm) or 11/64-inch (4.5 mm) profiles. The Hipa 12 Pack Chainsaw File solves file matching challenges by providing six distinct round file sizes, spanning from 1/8 inch to 7/32 inch, with size markings stamped into each file body. Having this selection on hand allows operators to sharpen homeowner pole saws, mid-range firewood saws, and commercial timber powerheads accurately.
Manual Hand Filing vs Electric Diamond Burr Sharpening
Chainsaw operators generally choose between traditional manual hand filing and high-speed electric rotary sharpening. Manual filing relies on hardened steel round files held in a file guide or clamped inside an ergonomic wooden handle. Hand filing provides superior tactile feedback, letting you feel exactly when dull chrome gives way to fresh steel while removing the absolute minimum amount of tooth material. This conservative material removal maximizes the overall lifespan of the chain loop, often allowing fifteen to twenty sharpenings before tooth replacement is necessary. Manual filing also requires zero electrical power, making it the most dependable method when bucking firewood far from the shop.
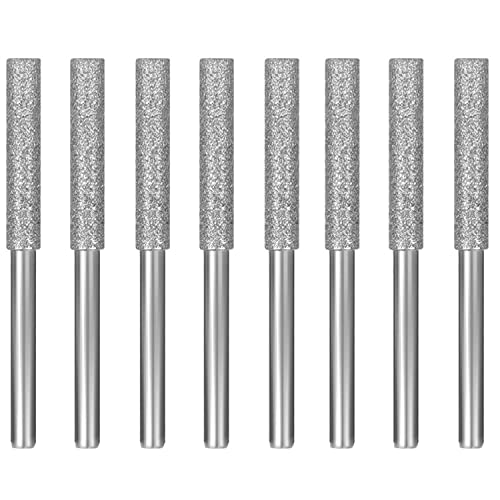
Electric sharpening using rotary tools equipped with diamond-coated grinding bits represents a much faster alternative for shop touch-ups and severe rock damage. Bits such as the AccEncyc 8pcs Diamond Chainsaw Sharpener Burr feature durable titanium plating embedded with industrial diamond particles mounted on a standard 1/8-inch shank. When run in a high-speed mini rotary tool or dedicated electric sharpener, these 3/16-inch burrs can recondition damaged cutting teeth in a fraction of the time required by hand files. The hard diamond coating handles heat well and resists shedding abrasive material even when grinding through rock-struck cutter teeth. Operators must apply light, steady pressure to avoid overheating the metal and softening the hardened cutter temper.
Step-by-Step Tooth Sharpening Technique and Angles
Begin any sharpening procedure by securing the chainsaw powerhead on a flat, stable surface such as a shop workbench or a solid stump. Shut off the engine completely and disconnect the spark plug boot, or remove the battery pack if maintaining a cordless unit. Secure the guide bar in a dedicated bar vise to eliminate rocking and vibration during the filing stroke. Adjust the chain tension slightly tighter than normal working tension to prevent the cutters from rocking backward on the guide bar rails while filing. Inspect the chain carefully to identify the shortest or most heavily damaged cutter, which will serve as your master reference tooth.
Mount your selected round file in a wooden handle or clamping file guide, ensuring that roughly one-fifth of the file diameter extends above the cutter top plate. Align the file with the factory filing angle stamped on the tooth, which is typically 25 to 30 degrees relative to the guide bar. Keep the file completely level horizontally, or maintain a 10-degree upward tilt if specified for your particular chisel chain profile. Execute smooth, deliberate forward strokes pushing the file from the inside of the cutter toward the outside cutting edge. Never draw the file backward across the tooth, as the reverse dragging motion quickly dulls the file teeth and damages the fine cutting edge.
Count the number of moderate forward strokes needed to restore a clean, silver edge on the master cutter, which usually requires three to five smooth passes. File all matching cutters pointing in that same direction along the loop using the exact same stroke count to maintain consistent tooth lengths. Once the first set of cutters is completed, turn the saw around or switch sides to sharpen the opposing set of teeth facing the other direction. Maintaining uniform length across every tooth along the chain loop prevents uneven tracking and keeps the saw cutting along a straight path. Operators maintaining modern powerheads, or even vintage platforms like legacy Jonsered chainsaws, will find that symmetrical cutters dramatically reduce cutting chatter and stress on the drive sprocket.
Setting Depth Gauges with Flat Files and Raker Tools
Filing cutter teeth without addressing depth gauges is a common oversight that leads to disappointing wood cutting efficiency. After every two or three tooth sharpenings, the depth gauges must be checked and filed down using a dedicated flat file and a metal depth gauge tool. Most saw chains require a depth gauge clearance of .025 inch for standard hardwood cutting, or .030 inch when cutting primarily softwoods like pine and cedar. Placing a slotted depth gauge tool directly over the cutter tooth exposes any excess raker metal projecting above the gauge slot.
The Hipa 12 Pack Chainsaw File includes a dedicated two-in-one depth gauge tool and a six-inch flat file to perform this operation with precision. Position the tool firmly over the cutter so the raker protrudes through the appropriate slot (.025 or .030 inch). Using your flat file equipped with a comfortable wooden handle, file the protruding metal flush with the top of the hardened guide plate. After lowering the depth gauge flat, remove the guide tool and use the flat file to gently round off the leading front corner of the raker. Preserving this contoured front curve ensures the depth gauge glides smoothly into the wood fiber rather than grabbing or causing harsh handle vibration.
Guide Bar Channel Dressing and Sprocket Inspection
Sharpening your cutting chain provides the ideal opportunity to inspect and service the guide bar and drive system. Over time, wood shavings, fine abrasive dust, and tacky bar oil accumulate inside the guide bar groove, restricting proper oil distribution. A specialized bar groove cleaner allows you to scrape out packed debris and clear blocked oil supply holes quickly. Cleaning the bar groove ensures the drive links glide freely and that fresh bar oil reaches the critical friction points along the rails. Neglecting groove maintenance leads to dry chain running, excessive frictional drag, and premature powerhead clutch wear.
Inspect the guide bar rails for signs of mushrooming, feathering, or uneven rail height caused by high friction. When metal burrs develop along the outer edges of the rails, use your flat file held at a 90-degree angle to dress the rails square and flat. Flip the guide bar over every time you perform a thorough loop sharpening or replacement to ensure both rails wear evenly over time. Check the drive sprocket behind the clutch drum for excessive wear grooves or notched teeth. If the drive sprocket shows grooving deeper than .020 inch, replace it immediately to prevent premature wear on your newly filed chain drive links.
Operational Verification and Troubleshooting Crooked Cuts
Before starting the saw after a sharpening session, reset the chain tension to its proper operating specification. Disengage the chain brake and lift the nose of the guide bar upward while tightening the bar nuts with a scrench. Tension the chain until the drive links remain fully seated in the bar channel without sagging along the lower rail, yet the loop can still be pulled smoothly around the bar by a gloved hand. Snapping the chain against the rail should produce a clean, crisp return without binding tightly against the sprocket nose. Proper tensioning prevents the chain from jumping out of the groove while preserving the life of the needle bearing.
Start the powerhead and run the engine at moderate throttle over a clean stump or pale piece of cardboard to verify oiler output. A distinct line of fine oil spray should appear across the test surface within several seconds, confirming that the oil pump and bar ports are delivering adequate lubrication. Proper oil delivery is especially critical when evaluating modern electric chainsaw performance, where instant motor torque generates rapid heat along the guide bar. Once proper oiling is verified, test the cut on a piece of clean scrap timber to evaluate tracking. Inspecting the sawdust confirms that the chain is ejecting large, crisp wood chips rather than fine powder.
If the saw pulls noticeably to the left or right during a straight cut, the cutters on one side are almost certainly duller, shorter, or filed at a steeper angle than the other. Uneven depth gauge heights also cause crooked cuts by allowing one side of the chain to take a larger bite of wood on every revolution. When this tracking error occurs, re-inspect the chain with a quick-check gauge to identify discrepancies in tooth length or raker clearance. Truing the shorter cutters and equalizing depth gauge heights quickly restores straight, aggressive cutting performance through any log.
Consistent field maintenance eliminates operator fatigue and protects expensive powerhead components from premature failure. Taking five minutes to file your cutting teeth and clean the bar channel after every few tanks of fuel guarantees reliable cutting performance. Whether you use versatile multi-size manual file kits or fast diamond rotary burrs, maintaining sharp cutting edges transforms challenging woodlot chores into smooth, effortless operations. Treat chain maintenance as an integral part of your sawing routine to keep every cut safe, fast, and remarkably clean.





Write Your Review
No reviews yet. Be the first to share your experience!