


A neglected mower emerging from months in a cold garage often struggles with stale fuel, sluggish governor linkages, and a dull cutting edge. Taking the time to understand how to prep lawn mower for spring prevents frustrating weekend pull-cord sessions and protects your turf from ragged cuts that invite fungal disease. A systematic spring wake-up routine ensures clean combustion, stable engine speed, and balanced blade rotation across the growing season. Homeowners who service their machines before the first warm weekend save time and avoid costly mid-season repairs.
Routine seasonal maintenance involves inspecting the ignition system, swapping degraded fluids, cleaning underneath the cutting deck, and evaluating the cutting assembly. If your cutting edge shows gouges or signs of heavy wear, reviewing a step-by-step mower blade removal guide can help you safely inspect the undercarriage before making adjustments. Addressing stretched linkages, testing safety bail switches, and verifying that rotating components remain true helps maintain consistent engine response throughout spring growth. Investing an afternoon in seasonal preparation restores reliable starts and keeps your machine operating smoothly across every mowing session.

Pros
- Quick installation with no complicated steps - anyone comfortable with basic engine maintenance can do it
- Durable metal construction holds up under engine heat and repeated cycling without losing tension
- Correctly sized to fit a wide range of lawn mower engines, reducing guesswork and returns
- Affordable price point compared to buying individual springs or entire tune-up kits
Cons
- Does not include a guide to confirm which spring size matches a specific engine model - you need to measure or check your old spring
- Some users may find the springs slightly stiffer than the original, requiring a minor adjustment to the governor arm
- Limited to idle/governor applications; not meant for throttle, choke, or other control cables
The Threlaco 6 Pack Governor Spring Replacement (part numbers 691859 and 692211) is a straightforward solution for lawn mower owners facing a surging, hunting, or stalling engine. While not a power tool itself, it is an essential maintenance component that belongs in any small-engine workshop. These springs control the governor arm, which regulates engine speed under load. Over time, factory springs stretch or break, leading to erratic idle and poor cutting performance. This set gives you both large and small springs to cover most popular applications.
Best suited for DIY homeowners who maintain their own mowers, this kit also works for small engine repair shops or budget-conscious contractors who keep a fleet of equipment. The springs are made from a quality metal that resists corrosion and fatigue, so they hold their shape even after hundreds of hours of vibration. They install by simply hooking onto the governor arm and a fixed point - no special tools required. This means you can often fix a mower in less than 10 minutes without removing the carburetor or disassembling the engine.
In real-world use, these springs restore a stable idle and allow the governor to respond correctly when grass load changes. The large spring handles the main governor tension, while the smaller spring fine-tunes idle speed. Users should check their existing spring dimensions or part number to select the right one, as the kit supplies both sizes but not every engine uses both. Build quality feels solid for the price, and the springs come neatly packed for storage.
One realistic limitation is that there is no detailed compatibility list included. You will need to verify your engine model or measure your old spring against the provided sizes (large: 67x6mm, small: 44x3mm). Also, some engines may require a slightly different spring rate, especially older models. Still, for the majority of common lawn mower engines from brands like Briggs & Stratton, Tecumseh, Kohler, and Honda, these springs fit well and perform reliably.
Overall, the Threlaco governor spring set is a smart, low-cost investment for anyone who keeps a lawn mower running. If you have a mower that surges at idle or stalls when engaging the blade, try replacing the governor spring before buying a new carburetor. It is an easy DIY fix that saves money and extends the life of your equipment. Keep a set in your workshop for instant repairs during mowing season.

Pros
- Metal build feels solid and durable for long-term use
- Accurate static balancing method works reliably with most standard blades
- Universal cone design accommodates various center hole shapes and sizes
- Easy to use with no setup required - just place and balance
- Affordable two-pack offers great value for DIY homeowners
Cons
- Best results require a perfectly level surface - not ideal for uneven jobsite use
- May not balance non-circular or unusually shaped center holes as effectively
- Cone steps are relatively small - large blades may be top-heavy
The TonGass 2-Pack Metal Precision Blade Balancers are a simple but essential tool for anyone who sharpens their own lawn mower blades. These static balancers let you check and correct blade balance after grinding, which reduces vibration, improves cut quality, and protects your mower's engine from unnecessary wear.
Best suited for DIY homeowners and lawn care enthusiasts who sharpen blades at home. If you already use a bench grinder or file to sharpen, this balancer should be a staple in your workshop. It's also handy for small engine repair shops that want a quick, reliable balancing check without expensive electronic gear.
In real-world use, the balancer performs exactly as expected. Just set it on a level surface - like a workbench or concrete floor - place the blade's center hole over the cone, and let it settle. A balanced blade stays horizontal; an unbalanced one dips to the heavy side. The metal construction feels sturdy enough for daily use, and the compact size means it stows easily in a drawer or toolbox. The two-pack is nice because you can keep one at the sharpening station and one in your mower shed, or share with a neighbor.
Build quality is solid for the price - all metal with a clean finish, no plastic parts to break. The cone has stepped diameters to fit different hole sizes, and the base is wide enough for stability. One limitation: you absolutely need a level surface for accurate results. If your workbench is uneven, the balancer won't read true. Also, while the cone fits most standard blades, very large or oddly shaped center holes might not seat properly.
Overall, if you sharpen lawn mower blades at home, the TonGass blade balancers are a worthwhile addition. They take the guesswork out of balancing, help your mower run smoother, and cost less than a typical gas fill-up. For DIY homeowners who want to extend the life of their equipment and get a cleaner cut, this two-pack is an easy recommendation.
Package Dimensions: 3.43 x 2.8 x 2.48 inches
Item Weight: 6.4 ounces (both balancers combined)
Manufacturer: TonGass
Model: bladebalancermetal
Material: Metal base and stepped cone
Cone largest step: 1 3/8 inches
Base diameter: 2.36 inches
Compatibility: Most lawn mower blades with circular or standard center holes
Essential Steps to Prep Your Lawn Mower for Spring
Waking a lawn mower from winter storage requires a systematic inspection of fuel quality, ignition components, mechanical linkages, and cutting assemblies. Neglecting these seasonal checks often leads to rough idling, excessive deck vibration, or an outright refusal to start when spring grass begins rapid growth. Homeowners should approach the tune-up in an orderly sequence, starting with electrical isolation and finishing with a controlled test run. Addressing mechanical fatigue before mowing season begins ensures dependable cutting performance and prevents premature wear on critical engine components.
Disconnecting the Spark Plug and Battery for Safe Inspection
Safety must remain the primary consideration before beginning any mechanical inspection or physical work underneath a mower deck. Disconnecting the spark plug wire and tucking the boot securely away from the terminal prevents accidental combustion while turning the blade by hand. For battery-powered mowers or gas units with electric start, removing the main battery pack or disconnecting the starter harness provides essential isolation. Work gloves and eye protection should always be worn when handling sharp metal edges or loosening stubborn fasteners.
Accidental engine turnover can occur if residual fuel in the cylinder ignites when the cutting blade is rotated manually. Mechanical resistance felt while turning the blade is normal engine compression, but an attached plug wire leaves open the possibility of a spark event. Tipping the mower also requires deliberate caution to prevent engine oil from saturating the air cleaner or seeping into the exhaust muffler. Always ensure the carburetor and air intake remain facing upward whenever tilting the machine for inspection or cleaning.
Inspecting and Replacing Stale Fuel and Oil
Untreated gasoline containing ethanol begins degrading in as little as thirty days, absorbing ambient moisture and forming sticky varnish inside fuel lines and carburetor passages. If fuel was left in the tank over the winter without a quality stabilizer, draining the old gasoline into an approved container is the most reliable remedy. Fresh, clean unleaded fuel should replace stale gas to ensure crisp ignition and prevent clogged pilot jets. Checking the fuel cap vent hole for blockages also helps prevent fuel starvation during prolonged mowing cycles.
Engine oil lubricates the internal crankshaft, connecting rod, and cylinder walls, but it breaks down thermally and collects microscopic contaminants over time. Checking the dipstick reveals both the fluid level and its overall clarity, with dark or milky oil signaling the need for an immediate flush. Unscrewing the drain plug or using a fluid siphon allows complete removal of contaminated oil before refilling with fresh oil of the manufacturer-recommended viscosity. Maintaining correct oil volume prevents both oil aeration from overfilling and catastrophic internal friction from low fluid levels.
Air Filter and Spark Plug Service
A clean air filter allows the engine to breathe freely and maintains the correct air-to-fuel ratio needed for smooth power delivery. Paper pleated filters should be inspected for dirt accumulation, torn gaskets, or oil saturation, replacing any element that appears clogged or degraded. Foam pre-filters can often be washed in warm soapy water, thoroughly dried, and lightly oiled if the manufacturer guidelines recommend it. Running an engine with a restricted air filter causes unburned fuel to deposit heavy carbon on the spark plug electrode.
The spark plug provides the electrical ignition needed to burn the fuel mixture cleanly inside the combustion chamber. Removing the plug with an appropriate deep socket allows visual inspection of the electrode for severe erosion, oil fouling, or heavy carbon buildup. While light deposits can sometimes be cleaned with a wire brush, installing a fresh plug with the factory-specified electrode gap provides reliable starting power. Tightening the spark plug gently to the manufacturer torque specification protects aluminum cylinder head threads from stripping.
Inspecting Governor Springs and Throttle Linkages
Engines that surge, hunt up and down in engine speed, or fail to sustain power in thick turf often suffer from weakened governor linkages. Governor springs balance mechanical engine speed against throttle plate movement, maintaining a steady operating RPM regardless of fluctuating grass density. Over months of seasonal use and damp winter storage, these delicate tension springs can lose elasticity, stretch out of shape, or develop surface rust. When a spring fails to return cleanly, the engine governor oscillates uncontrollably and causes noticeable power surging across the mowing deck.
Replacing stretched governor idle springs restores precise engine governing and prevents dangerous over-revving under light cutting loads. Replacement parts like the Threlaco 6 Pack 691859 692211 Governor Spring provide direct replacements for popular part numbers 691859 and 692211, which fit common lawn mower small engines. The set contains both large springs measuring about 2.6 inches by 0.2 inches and smaller idle springs measuring roughly 1.7 inches by 0.1 inches made from durable metal. Swapping these components requires only basic needle-nose pliers to unhook the fatigued wire ends and slip the fresh springs into the factory linkage holes.
Verifying that the throttle plate and governor arm move freely without binding is just as important as installing new springs. Dirt, dried grass clippings, and accumulated grease around the carburetor bracket can restrict linkage motion and mimic mechanical governor failure. Gently cleaning the pivot points with a soft brush and non-residue carburetor cleaner restores free movement across the entire throttle range. Once installed, the new springs should hold firm tension against the throttle control bracket without binding against adjacent engine shrouds.
Cleaning the Underside of the Mower Deck
Accumulated grass clippings underneath the cutting deck form a dense, damp crust that traps moisture directly against bare stamped steel. Over the winter, this trapped organic matter accelerates metal oxidation, leading to pinholes, deck rust, and compromised structural integrity. Scraping away packed debris using a plastic scraper or wooden putty knife restores a smooth surface for optimal cutting airflow. A clean deck allows discharged grass clippings to exit cleanly rather than clumping and bogging down the engine.
Washing the deck undercarriage with water can be effective, but the deck must be allowed to dry completely before storage or use. Applying a light protective film of silicone spray or specialized deck protectant helps discourage fresh grass clippings from adhering during wet spring cuts. While cleaning underneath, inspecting the deck baffles, discharge chute hinge, and mulching plug ensures no hardware has worked loose from vibration. Maintaining a smooth, unobstructed cutting chamber improves both mulching performance and grass collection efficiency in rear-bagger setups.
Removing, Inspecting, and Sharpening the Blade
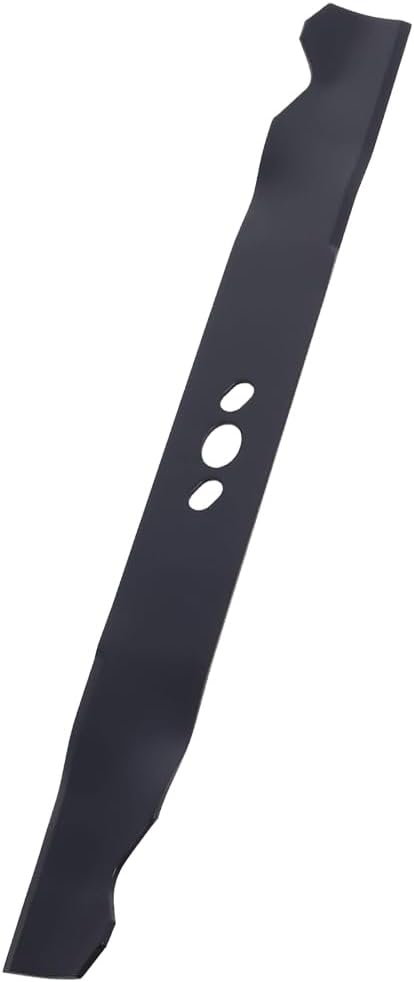
Dull mower blades tear grass blades rather than slicing them cleanly, leaving jagged brown tips that weaken the lawn and invite disease. Safely detaching the blade requires locking it with a wooden block against the deck skirt while loosening the center mounting bolt with a breaker bar. Consulting a mower blade setup tools overview can help you identify appropriate socket sizes and safety equipment before tackling seized hardware. Once removed, inspect the cutting edges and blade sail for deep gouges, severe thinning, or structural cracks that mandate immediate replacement.
Sharpening should follow the original factory bevel angle of roughly thirty degrees, removing only enough metal to restore a crisp edge without overheating the steel. An unbalanced blade causes severe high-frequency vibration that travels through the crankshaft, damaging engine bearings, deck spindles, and handle brackets over time. Checking the blade on a static cone balancer identifies whether one cutting wing is heavier than the other after grinding. If the blade tips downward on one side, additional material must be ground from the back of the heavy wing until balance is restored.
Using dedicated balancing equipment ensures accurate readings across different center hole configurations and blade thicknesses. The TonGass two-pack precision metal blade balancer utilizes a stable 2.36-inch base with a stepped cone reaching up to 1 3/8 inches to accommodate standard circular center holes. Because it is constructed of metal rather than flexible plastic, it remains centered on its pin to provide a reliable static balance check. If sharpening fails to correct severe runout or if the blade is noticeably bent, reviewing a replacement mower blade cost overview provides helpful context on replacement part pricing before you reinstall unsafe steel.
Checking Drive Belts, Cables, and Wheels
Self-propelled lawn mowers rely on drive belts and tensioned control cables to transfer rotational power from the engine shaft to the drive wheels. Inspecting the drive belt requires removing the protective top belt cover to look for edge fraying, rubber cracking, or glazed surfaces that cause belt slip. Adjusting the cable barrel adjuster eliminates excess slack in the drive bail, ensuring immediate propulsion when the handle control is engaged. Pulleys and idler arms should turn smoothly by hand without grinding noises or excessive lateral play.
Mower wheels and height adjusters also require a quick seasonal checkup to ensure smooth rolling and level cutting heights across all four corners. Plastic wheel gears on front-drive and rear-drive models can accumulate grit that grinds down drive teeth, leading to intermittent wheel slip. Removing each drive wheel to brush away debris and lightly lubricating the drive pinions restores dependable forward traction. Checking that height adjustment levers snap firmly into each wheel notch prevents the cutting deck from dropping unevenly during operation.
Battery Maintenance for Electric and Electric-Start Mowers
Cordless battery-powered mowers and gas mowers equipped with key-start ignitions require dedicated electrical care after months in cold storage. Gas mower lead-acid or small lithium starter batteries often lose charge through slow parasitic drain and cold ambient temperatures during winter. Recharging the starter battery fully and cleaning corrosion off the electrical terminals with a baking soda solution prevents starting failures. For cordless electric mowers, ensuring the high-voltage battery packs were stored at moderate temperatures helps preserve overall cell longevity and runtime.
Inspect electrical wiring harnesses, handle interlock switches, and battery housing contacts for signs of rodent damage, oxidation, or loose connections. Clean electrical contact points ensure steady current delivery, preventing intermittent motor cutouts or starter motor solenoid clicking. For walk-behind cordless platforms, test the safety push-button and bail lever to verify that the electric motor stops instantly when releasing the handle. Storing lithium batteries indoors until mowing day protects cell chemistry from unseasonably cold early spring temperatures.
Conducting the First Spring Test Run and Post-Start Checks
Before firing up the engine for the first time, take the machine outdoors to an open, well-ventilated area away from dry leaves or combustible materials. Push the primer bulb if equipped, engage the engine brake bail against the handle, and pull the starter cord with a smooth, firm stroke. A brief puff of white or blue smoke during the initial seconds is normal if fogging oil or assembly lubricant was present inside the cylinder. Allow the engine to idle for two to three minutes so fresh oil circulates completely across all internal friction surfaces.
Listen carefully to the engine cadence as it reaches operating temperature, checking for steady RPM without surging, hunting, or excessive mechanical rattling. Engage the self-propelled drive mechanism to verify smooth clutch engagement and ensure the wheels disengage completely when the lever is released. Check the cutting deck visually from behind the handle to confirm that blade vibration remains minimal at full throttle. Shutting down the engine after the test run allows a final check for fuel leaks or loose hardware before tackling the lawn.
Seasonal Best Practices and Storage Prevention
Adopting sound seasonal mowing practices keeps your freshly tuned machine running cleanly throughout the intense spring growth flush. Washing clippings from the top of the deck after each use prevents abrasive debris from filtering into drive pulleys, belts, and engine cooling fins. Keeping a spare set of wear items like air filters, spark plugs, and replacement governor springs on hand eliminates unexpected downtime during peak mowing weeks. Regularly inspecting your cutting blade edge after hitting stones or roots ensures that tiny nicks do not evolve into major blade imbalances.
Preparing ahead of time also simplifies the winterization process when the growing season eventually winds down in late autumn. Running the fuel tank completely dry or adding a quality fuel stabilizer before winter storage preserves sensitive carburetor passages for the next annual cycle. Storing the mower in a dry, covered shed or garage shields metal decks and electronic components from freeze-thaw cycles and moisture. Taking proactive steps today guarantees that your lawn mower remains dependable, fuel-efficient, and ready for clean cutting year after year.




Write Your Review
No reviews yet. Be the first to share your experience!