


Winter storage often leaves outdoor power equipment sitting idle for months, exposing fuel systems, spark plugs, and cutting decks to moisture and stale residue. When early turf growth demands the first trim of the season, a machine that refuses to turn over or surges erratically can quickly derail weekend lawn care plans. Taking time to understand how to prep your lawn mower for spring ensures your walk-behind or riding mower starts reliably and cuts grass evenly from opening day onward. Addressing basic maintenance tasks early prevents common engine stalling and protects the structural health of your mower deck before heavy yard work begins.
A thorough pre-season service routine involves inspecting safety interlocks, replacing degraded fuel, inspecting throttle linkages, and examining the cutting assembly. If your machine suffered dull cuts late last autumn, learning the proper steps for safely removing a mower blade allows for easy sharpening or complete blade replacement. Inspecting smaller mechanical components such as governor idle springs and choke linkages is equally vital to maintain consistent engine speed under varying turf loads. Preparing equipment methodically ahead of spring growth saves frustrating troubleshooting down the road and keeps every mowing pass clean.

Pros
- Quick installation with no complicated steps - anyone comfortable with basic engine maintenance can do it
- Durable metal construction holds up under engine heat and repeated cycling without losing tension
- Correctly sized to fit a wide range of lawn mower engines, reducing guesswork and returns
- Affordable price point compared to buying individual springs or entire tune-up kits
Cons
- Does not include a guide to confirm which spring size matches a specific engine model - you need to measure or check your old spring
- Some users may find the springs slightly stiffer than the original, requiring a minor adjustment to the governor arm
- Limited to idle/governor applications; not meant for throttle, choke, or other control cables
The Threlaco 6 Pack Governor Spring Replacement (part numbers 691859 and 692211) is a straightforward solution for lawn mower owners facing a surging, hunting, or stalling engine. While not a power tool itself, it is an essential maintenance component that belongs in any small-engine workshop. These springs control the governor arm, which regulates engine speed under load. Over time, factory springs stretch or break, leading to erratic idle and poor cutting performance. This set gives you both large and small springs to cover most popular applications.
Best suited for DIY homeowners who maintain their own mowers, this kit also works for small engine repair shops or budget-conscious contractors who keep a fleet of equipment. The springs are made from a quality metal that resists corrosion and fatigue, so they hold their shape even after hundreds of hours of vibration. They install by simply hooking onto the governor arm and a fixed point - no special tools required. This means you can often fix a mower in less than 10 minutes without removing the carburetor or disassembling the engine.
In real-world use, these springs restore a stable idle and allow the governor to respond correctly when grass load changes. The large spring handles the main governor tension, while the smaller spring fine-tunes idle speed. Users should check their existing spring dimensions or part number to select the right one, as the kit supplies both sizes but not every engine uses both. Build quality feels solid for the price, and the springs come neatly packed for storage.
One realistic limitation is that there is no detailed compatibility list included. You will need to verify your engine model or measure your old spring against the provided sizes (large: 67x6mm, small: 44x3mm). Also, some engines may require a slightly different spring rate, especially older models. Still, for the majority of common lawn mower engines from brands like Briggs & Stratton, Tecumseh, Kohler, and Honda, these springs fit well and perform reliably.
Overall, the Threlaco governor spring set is a smart, low-cost investment for anyone who keeps a lawn mower running. If you have a mower that surges at idle or stalls when engaging the blade, try replacing the governor spring before buying a new carburetor. It is an easy DIY fix that saves money and extends the life of your equipment. Keep a set in your workshop for instant repairs during mowing season.

Pros
- Affordable parts that solve common mower starting and speed problems.
- Restores original engine performance and fuel efficiency.
- Simple installation with no special tools required.
- Compatible with many popular mower brands using BS engines.
- Compact size makes them easy to store or carry in a tool kit.
Cons
- No customer reviews yet, so long-term durability is less certain.
- Compatibility is limited to specific Briggs & Stratton engine models; double-check your model before buying.
- Small springs can be easily lost during installation, so work on a clean surface.
If your lawn mower has been hard to start, surging, or running erratically, the problem might be in the carburetor springs. The CLSR2U Air Vane Choke Spring and Governor Spring set is a simple, low-cost fix for many Briggs & Stratton engines. This kit includes the short air vane spring (replaces 790849) and the longer governor spring (replaces 699056), which together restore the automatic choke and engine speed control.
Who should buy this? DIY homeowners and small-engine enthusiasts who want to avoid a trip to the repair shop. If you have basic mechanical skills and a screwdriver, you can swap these springs in under 15 minutes. It is not meant for commercial-grade mowers or engines from other manufacturers, but it fits a wide range of popular models from Toro, Craftsman, Troy Bilt, and others that use BS engines.
In terms of performance, the springs do exactly what they are supposed to: the air vane spring pulls the choke closed during cold starts and releases it as the engine warms up. The governor spring modulates the throttle to maintain steady RPM under load. After installation, you should see smoother starts, less surging, and more consistent cutting power. These are simple coil springs with no complex parts, so reliability largely depends on the quality of the steel. CLSR2U appears to use a standard spring steel that should hold tension well for several seasons.
One realistic drawback is the lack of verified user feedback. At the time of writing, there are no reviews, so you are trusting the brand's specs. Also, compatibility can be tricky. Not all BS engines use the same spring setup, so verify your engine model and existing part numbers before ordering. The springs are small and can be lost easily, so work carefully on a flat surface.
Overall, this is a smart purchase for anyone comfortable with basic lawn mower maintenance. At this price point, it is a low-risk way to breathe new life into an older mower without spending on a full carburetor replacement. If you are dealing with starting or governing issues and your engine model matches, these springs are worth trying.
Brand: CLSR2U
Package Contents: 1 short air vane spring (replaces 790849) and 1 long governor spring (replaces 699056)
Material: Spring steel
Color: Black
Dimensions: 0.2 x 1 x 0.5 inches
Compatible Engines: Briggs & Stratton engines used in lawn mowers by Toro, Craftsman, Troy Bilt, and other brands
Product Group: Lawn & Patio
A Complete Step-by-Step Guide on How to Prep Your Lawn Mower for Spring
Spring preparation transforms a dormant lawn mower into a reliable, efficient machine ready to tackle rapid grass growth. Leaving equipment unserviced after winter storage frequently leads to hard starting, uneven engine RPM, and ragged grass blades that invite lawn disease. By systematically inspecting fuel, lubrication, ignition, throttle linkages, and cutting components, you protect your mechanical investment and ensure smooth weekend yard care. Following a structured maintenance workflow takes only an hour or two but eliminates the vast majority of seasonal operating headaches.
Disconnecting the Spark Plug and Securing the Workspace
Safety always serves as the primary starting point before performing any mechanical maintenance on outdoor power equipment. Before touching the mower deck, reaching near the cutting blade, or handling mechanical linkages, you must pull the spark plug boot firmly off the spark plug terminal. Grounding or tucking the loose ignition wire away from the metal engine block prevents accidental engine ignition if the blade rotates by hand. For cordless battery mowers or electric-start gas machines, remove the safety key and disconnect the main battery pack before proceeding.
Position your mower on a flat, clean concrete pad or driveway where spilled fluids can be quickly caught with absorbent pads or pans. Good lighting makes it far easier to spot hairline cracks in drive belts, leaking gaskets around the carburetor, or damaged throttle return springs. Keep a clean rag, standard socket set, wire brush, and an oil drain pan within arm’s reach to keep your work area tidy. Working methodically in an organized, stable environment keeps service tasks safe and prevents lost bolts or damaged linkages.
Draining Stale Fuel and Cleaning the Fuel System
Untreated gasoline deteriorates quickly, often degrading within thirty to sixty days as lighter hydrocarbons evaporate and leave behind sticky varnish. When modern ethanol-blended fuels sit in a small engine fuel tank over winter, they attract atmospheric moisture that corrodes carburetor bowls and clogs tiny fuel jets. If you stored your mower with fuel in the tank and did not add stabilizer, use a manual siphon pump to drain the remaining gasoline into an approved disposal container. Inspect the bottom of the empty fuel tank with a flashlight to ensure no sediment or gelatinous ethanol residue remains.
Replacing the inline fuel filter, if your mower utilizes one, is another straightforward way to prevent fuel starvation during heavy spring cutting. Refill the empty tank with fresh, high-octane or ethanol-free unleaded gasoline mixed with a reputable fuel stabilizer. Fresh fuel restores quick ignition characteristics and helps dissolve microscopic deposits before they accumulate inside the carburetor passages. If your machine refuses to idle smoothly after receiving fresh fuel, the carburetor bowl or throttle linkage system may require closer mechanical inspection.
Inspecting Carburetor Linkages and Replacing Worn Governor Springs
Engine surging, hunting, and failure to hold consistent cutting RPM are common spring complaints directly tied to stretched or rusted carburetor springs. The mechanical governor system on small engines relies on precise spring tension to balance engine load against throttle plate opening. If you notice rusted, stretched, or missing springs around the throttle bracket, replacing them restores steady engine speed. The Threlaco 6 Pack 691859 692211 Governor Spring set provides replacement governor idle springs manufactured to match standard dimensions for common small engine configurations. Having spare large and small springs on hand ensures you can replace worn parts without delaying early lawn work.
Auto-choke systems also rely on specialized springs that can weaken or corrode after extended damp storage. On many walk-behind engines, the short air vane choke spring maintains appropriate tension against cooling air flow to open the choke plate smoothly as the engine warms up. A replacement kit such as the CLSR2U Springs Compatible with BS Engines supplies both the 790849 air vane spring and the 699056 governor spring for compatible engines on Craftsman, Toro, and Troy-Bilt mowers. Installing fresh springs with proper tension prevents rich stalling during cold starts and stabilizes high-load cutting passes.
When swapping governor or choke springs, take a quick digital photo of the original bracket hole positions before unhooking the old hardware. Small engine throttle brackets frequently feature multiple holes that adjust engine sensitivity and top operating RPM. Hook the new replacement spring carefully using needle-nose pliers to avoid distorting the delicate coils during installation. Once installed, cycle the throttle control lever back and forth manually to verify that the linkages move freely without binding against the engine shroud.
Changing the Engine Oil and Inspecting the Drain Plug
Engine oil breaks down over time, collecting microscopic combustion soot, moisture, and unburned fuel acids that accelerate internal engine wear. Running fresh oil provides essential lubrication to the piston, connecting rod, and crankshaft during demanding spring mowing sessions. Before draining the old oil, running the engine for two minutes warms the fluid, allowing suspended contaminants to flow out more completely. Always verify that your drain container is rated for automotive fluids and positioned directly under the drain port or dipstick tube.
Some modern walk-behind mowers drain oil through a bottom plug, while others require tilting the mower on its side to drain through the fill tube. When tilting any mower, always position the machine so the air filter and carburetor face upward toward the ceiling. Tilting the air cleaner downward allows oil to flood the intake tract and saturate the paper air filter element. After fully draining the dark oil, reinstall the drain plug securely and refill the crankcase with manufacturer-recommended four-stroke oil, verifying the level on the dipstick.
Servicing the Air Filter and Cleaning the Intake Housing
A clean air filter is vital for maintaining the correct air-to-fuel ratio, engine power output, and overall fuel efficiency. Dust, dried leaf debris, and grass clippings from previous autumn yard work often remain trapped within the pleats of the filter cartridge. Remove the air cleaner cover and carefully unseat the filter assembly to avoid knocking loose dirt into the exposed carburetor throat. Wipe the inside of the plastic air filter housing using a clean, damp shop towel before inspecting the filter media itself.
If your mower uses a pleated paper filter element, inspect it under a bright light to check for embedded dirt, torn paper, or oil soaking. Paper filters cannot be washed effectively and must be discarded if heavy dirt obscures the light or if engine oil has saturated the paper. Foam pre-filters, on the other hand, can be washed in warm, soapy water, rinsed thoroughly, dried, and lightly oiled with fresh engine oil. Sealing the cleaned or new filter firmly into the housing ensures that only filtered air enters the engine combustion chamber.
Testing the Spark Plug and Setting the Electrode Gap
A healthy ignition system delivers a hot, consistent spark that ignites the compressed air-fuel charge without misfires. After unthreading the spark plug using an appropriate deep-well spark plug socket, inspect the firing end for carbon fouling or heavy oil glaze. Light brown or grey electrode deposits indicate normal combustion, while thick black crust indicates incomplete combustion or an overly rich fuel mixture. Use a fine brass wire brush to clean minor deposits off the center electrode and porcelain insulator.
Measure the spark plug electrode gap using a wire feeler gauge, comparing the reading to the manufacturer specification printed in your operator manual. Most walk-behind mower spark plugs require an electrode gap between 0.020 and 0.030 inches for clean spark generation. If the electrodes exhibit rounded edges, deep pitting, or cracked ceramic insulation, installing a brand-new plug is an inexpensive way to guarantee quick starting. Thread the new or cleaned plug into the cylinder head by hand first to prevent cross-threading before snugging it down with a socket wrench.
Under-Deck Cleaning and Blade Inspection
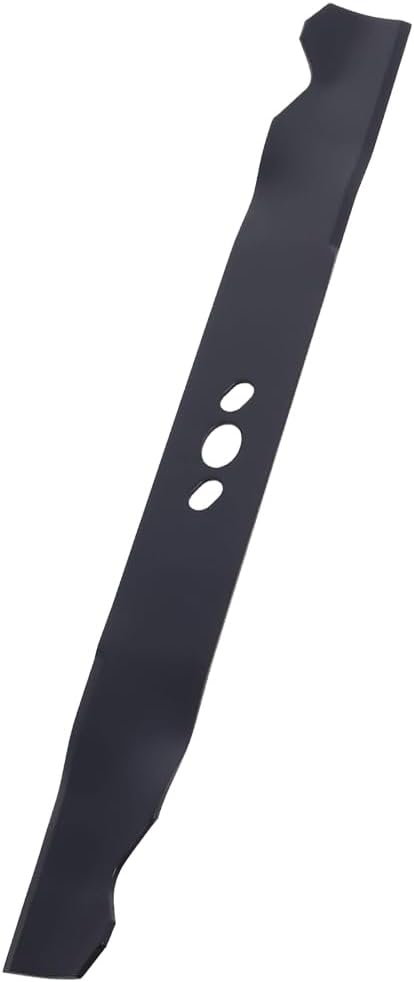
Damp grass clippings that sit plastered against the underside of the mower deck over the winter trap moisture and accelerate steel corrosion. Turn the mower on its side with the carburetor pointing skyward and scrape away dried mud, grass buildup, and debris using a plastic or wooden putty knife. Removing this caked layer restores proper airflow under the deck, which is essential for effective mulching and bagging performance. Once the underside is clean, inspect the steel cutting blade for gouges, uneven wear, or bent lift wings.
A dull or unbalanced blade rips grass rather than slicing it cleanly, leaving brown, frayed tips that stress your turf during early spring growth. When evaluating severe blade damage or deep stone chips, reviewing replacement mower blade costs helps determine whether sharpening the existing metal or fitting a fresh blade makes more financial sense. Check the blade adapter and center bolt for signs of wear, stripping, or looseness before remounting. Tightening the mounting hardware securely ensures safe rotation and eliminates blade wobble during operation.
Checking Drive Belts, Cables, and Wheel Height Adjusters
Self-propelled mowers rely on drive belts, tensioner pulleys, and control cables to transfer rotational power from the engine crankshaft to the drive wheels. Inspect the drive belt along its entire circumference for rubber cracking, dry rot, fraying, or loose slack that could cause drive slippage. Check the operator presence control cable and the drive engagement cable to ensure they actuate smoothly when you squeeze the handle bails. Lubricating pivot points with silicone spray prevents sticky cable action and guarantees immediate disengagement when you release the drive bail.
Wheel adjusters should also be cleaned of dried grime and lubricated so you can change cutting height effortlessly across seasonal lawn transitions. Keeping the deck level and drive system responsive is especially crucial when navigating a mower for half-acre properties where long mowing passes and varied turf heights test your machine’s endurance. Check wheel bearings or bushings for excessive play, ensuring the wheels spin freely without wobbling out of alignment. Properly adjusted cutting heights protect grass roots from scalping while early spring growth establishes itself.
Battery Maintenance for Electric Start and Cordless Battery Mowers
Winter cold temperatures can significantly deplete both small lead-acid starting batteries and larger lithium-ion tool batteries. For gas mowers equipped with key or push-button electric start, clean the battery terminals using a baking soda paste to remove white acid oxidation. Connect the battery to an appropriate trickle charger or tender to bring it back to full voltage before attempting your initial spring start. Inspect the wiring harness for rodent chew marks or loose spade connectors that could prevent the starter motor from cranking.
Cordless battery mowers require their own dedicated spring checkup to verify pack health and charger communication. Inspect the battery housing for cracks, inspect the metal contact blades for dirt, and bring the battery packs to room temperature before charging. Avoid attempting to charge lithium-ion batteries that are freezing cold, as charging below recommended temperatures can permanently damage battery cells. Once fully charged, insert the battery pack into the mower deck and confirm that the onboard power indicator illuminates accurately.
First Start-Up, Engine Warm-Up, and Operational Verification
With fresh fuel, clean oil, sharp blades, and verified linkages in place, your mower is ready for its maiden spring start-up. Reconnect the spark plug wire boot firmly over the spark plug terminal, ensuring the metal clip snaps securely onto the spark plug post. Move the mower outdoors into open air, set the throttle or choke lever according to manufacturer instructions, and pull the starter cord or engage the electric start. Allow the engine to idle steadily for two to three minutes without load so oil circulates thoroughly across all internal components.
Listen closely to the engine sound during warm-up to confirm that the governor maintains a consistent RPM without surging or dying. Engage the cutting blade over a clear, flat driveway or bare patch of ground to verify smooth blade engagement and absence of unusual vibration. Test the self-propelled drive system forward and reverse, checking that the drive wheels pull evenly without pulling to one side. Completing this final operational check gives you complete confidence that your mower is fully tuned and prepared for a productive mowing season.



Write Your Review
No reviews yet. Be the first to share your experience!