


Torn grass tips and uneven turf usually signal that your cutting edge has lost its sharpness or suffered impact damage from hidden yard debris. Knowing how do you change a lawn mower blade allows you to restore clean cutting performance without waiting days for a small engine repair shop. Routine seasonal maintenance keeps your grass healthier and reduces mechanical strain on your mower spindle and engine shaft. When preparing for replacement, checking lawn mower blade sizing helps confirm you have the exact dimensions before unbolting any hardware.
Switching out a dull or bent cutting blade requires straightforward safety precautions, the right socket tools, and a reliable method to immobilize the cutting deck components. Many property owners servicing modern gas or cordless electric mower cutting systems find that blade removal tools simplify the entire process by preventing unwanted spindle rotation. Taking a structured approach prevents common errors such as cross-threading bolts or mounting a replacement blade upside down. Understanding the proper mechanical steps ensures you can service your equipment safely and return your lawn to a crisp, manicured appearance.

Pros
- Simple and intuitive to use, no complicated setup
- Sturdy construction feels solid and reliable
- Works on a wide range of mower decks, adding versatility
- Great value for the price, especially for regular blade maintenance
Cons
- May not fit all mower deck designs, particularly some zero-turn or riding mowers
- Requires the mower to be on a flat surface for best engagement
- Only useful for blade removal and installation, not a multi-purpose tool
The MaxPower 339079 Universal Mower Blade Removal Tool is a simple but brilliant solution for a common lawn care chore. Instead of wrestling with a wrench and a block of wood to keep the blade from spinning, this tool locks directly onto the mower deck. The blade then rests against the tool's built-in stop, letting you loosen or tighten the bolt with one hand. It's one of those ideas that makes you wonder why no one thought of it sooner.
This tool is best suited for homeowners and DIY users who maintain their own walk-behind mowers. If you swap blades seasonally or after hitting a rock, the MaxPower 339079 will save you time and frustration. Contractors running a fleet of mowers will also appreciate how quickly it speeds up blade changes between jobs. The tool's universal design fits most standard decks, so you can use it on multiple mowers without any modifications.
In real-world use, the tool feels solid and well-built. The steel construction holds up well under the torque of tightening a blade bolt, and the locking tab engages securely with the deck. It doesn't slip or flex during use. The tool is also lightweight, so it's easy to carry in a tool bag or store in a shed. There's no learning curve, you simply slide it into place and get to work.
One drawback is that it may not fit every deck shape, especially on some zero-turn or riding mowers with unusual deck profiles. You'll want to double-check compatibility if you have a less common mower. Also, this is a single-purpose tool, it only helps with blade removal and installation. But for that one task, it does the job perfectly.
Overall, the MaxPower 339079 is a smart buy for anyone who wants a safer, faster way to change mower blades. It's not flashy, but it works exactly as advertised. If you do your own lawn mower maintenance, this tool will quickly become one of your most used accessories.
Product Dimensions: 8 x 4.75 x 2 inches
Item Weight: 1.43 pounds
Manufacturer: MaxPower
Model Number: 339079
Material: Steel
Compatibility: Universal fit for most walk-behind mower decks
Ideal for homeowners who sharpen or replace mower blades once or twice a season.
Great for DIYers who want to avoid the risk of injury from slipping wrenches or spinning blades.
Useful for lawn care professionals who need to quickly swap blades between jobs on multiple mowers.
Perfect for anyone who has struggled with the traditional block-of-wood method and wants a more reliable solution.

Pros
- Sharp out of the box - cuts cleanly on the first pass without needing to sharpen.
- Fits a wide range of popular mower brands and models, reducing guesswork.
- Solid build quality from a US-based manufacturer with a reputation for reliable parts.
- Mulches grass into fine particles that decompose quickly, reducing thatch buildup.
- Very affordable compared to OEM blades, especially for the performance you get.
Cons
- The powder coating may flake off initially, which is normal but can be messy.
- Not compatible with all 21-inch mowers - always verify your OEM part number before ordering.
- Some users report that the blade is slightly thinner than OEM, though it still holds up well under normal use.
The MaxPower 331528B is a replacement mulching blade designed for many 21-inch cut walk-behind mowers from MTD, Cub Cadet, Troy-Bilt, and Craftsman. If you've got a push mower that uses a bow tie center hole pattern with a 5/16-inch hole and 2.5-inch spacing, this blade is likely a direct drop-in. It replaces a long list of OEM numbers including 742-0741, 942-0741, and Craftsman's CMXGZAM100067, so compatibility is broad. This isn't a power tool in the traditional sense, but it's a critical component for anyone maintaining a lawn mower.
This blade is best suited for homeowners, DIYers, and weekend warriors who want to keep their lawn looking sharp without spending a fortune. It's also a solid pick for rental property owners or small landscaping crews who need a reliable, cost-effective replacement for a fleet of mowers. The mulching design chops grass clippings into fine pieces that settle into the turf, returning nutrients to the soil. That means less bagging and a healthier lawn overall.
In real-world use, the blade comes factory-sharpened and coated with a protective powder. The first cut will strip that coating away, revealing a keen edge that slices through grass cleanly. Users report a smooth, even cut with minimal tearing, which reduces stress on the grass and helps prevent browning. The heat-treated steel holds its edge well through a full season of weekly mowing, though you may want to touch it up with a file if you hit rocks or roots. Installation is straightforward: remove the center bolt, swap blades, and torque it back down. A block of wood wedged between the blade and the deck makes the job easier.
Build quality is solid for an aftermarket blade. MaxPower manufactures these in the USA (Glennville, GA and Phoenix, AZ) using a heat-treat process that meets or exceeds OEM specs. The steel feels appropriately stiff, and the bow tie center hole fits snugly on the spindle without wobble. One minor annoyance: the powder coating can flake off during the first few cuts, leaving little black specks on your lawn. That's cosmetic and harmless, but worth noting. Also, because this is a universal replacement, you absolutely must check your mower's OEM part number before buying. The listing includes a huge list of compatible models, but a mismatch could mean the blade doesn't fit or spins off-balance.
Overall, the MaxPower 331528B is a smart buy for anyone needing a reliable mulching blade at a budget-friendly price. It cuts well, fits a wide range of mowers, and is built to last. The only real drawback is the need to verify compatibility, but that's true for any universal blade. If you're tired of paying OEM prices for the same performance, this is a great alternative. Just double-check your part number, and you'll be back to mowing in no time.
Blade Length: 21 inches
Blade Width: 2.25 inches
Center Hole: Bow tie pattern, 5/16-inch diameter outer holes, 2.5-inch center-to-center spacing
Weight: 1.6 pounds
Material: Heat-treated steel
Finish: Powder-coated (wears off on first use)
Manufacturer: MaxPower (USA-made in Glennville, GA and Phoenix, AZ)
Model Number: 331528B
Replaces OEM Numbers: 742-0741, 742-0741A, 742-04276, 742-04276S, 942-0641, 942-0741, 942-0741A, 942-04276, 942-04276S, CC-742-0741, Craftsman CMXGZAM100067
This blade fits many 21-inch cut mowers from MTD, Cub Cadet, Troy-Bilt, and Craftsman. Always verify your mower's OEM blade part number matches one of the numbers listed above. Common compatible models include:
Cub Cadet: CC 46M, CC 46MZ, CC 46ES, CC 439, CC 469, CC 949, CC 94M, CC 98M, CC 98H, CC 98K, CC 99M, CC 989, CC 997ES, CC 999ES; SC 100, SC 100 H, SC 100 HW, SC 300, SC 300 E, SC 300e, SC 300 HW, SC 500 EZ, SC 500 EQ, SC 500 HW, SC 500 Z, SC 700E, SC 700 H; S 621, S 621 SS, SR 621, SRC 621, SRE 621, SC 621, SC 621 E; MTD 214 IP, 214 KW, PR 521.
Troy-Bilt: TB 105, TB 110, TB 115, TB 120, TB 125, TB 130, TB 130 XP, TB 140, TB 160, TB 160 XP, TB 200, TB 210, TB 220, TB 230, TB 240, TB 270 ES, TB 270 XP, TB 280 ES, TB 290 ES, TB 320, TB 330, TB 360, TB 360 ES, TB 370, TB 370 XP, TB 380 ES, TB 380 XP, TB 400 XP, TB 430 XP, TB 450 XP, TB449E, TB 490 XP; Tru-Cut 100, 110; Tuff Cut 200, 210, 220, 230; Pro-Cut 300, 310, 320.
Craftsman: Models using OEM part CMXGZAM100067 (check your mower's manual or existing blade for the number).

Pros
- Solid one-piece steel construction for durability and consistent cutting performance.
- Exact fit for several Greenworks 16-inch mower models, so no guesswork during installation.
- Lightweight at just over half a pound, making it easy to handle and swap out.
- Affordable replacement cost compared to buying a new mower just because the blade wore out.
Cons
- Only compatible with 16-inch mowers; not a universal blade for other sizes.
- Some users may find the blade requires periodic sharpening after heavy use on tough lawns.
- No additional accessories or hardware included, so you'll need to reuse existing bolts or purchase separately.
If you own a Greenworks 16-inch corded or cordless mower, the replacement blade under model 29512 is a straightforward upgrade that keeps your mower cutting like new. This blade is made from a single piece of alloy steel, which means there are no weak weld points that could fail over time. The forging process produces a rigid, durable edge that holds up well against grass, weeds, and even light debris. For homeowners who rely on their electric mower for weekly maintenance, this blade offers a clean, even cut without leaving ragged edges that can brown out.
The installation process is simple. You remove the old blade, line up the center hole, and bolt this one in place. The 15.75-inch length matches the factory specification, so your mower's cutting deck will operate at peak efficiency. Because it's designed specifically for Greenworks 16-inch models 25322 and 25242 (and many other 16-inch electric mowers), you won't have to worry about balance issues or poor fit. Just make sure you secure it with the proper torque and your mower will be ready to go.
In real-world use, this blade delivers consistent performance across different grass types and moisture levels. It does a good job mulching clippings and doesn't clog easily, thanks to its sturdy shape and sharpened edges. The one-piece steel construction also helps reduce vibration compared to blades with welded tips, which means less fatigue on your hands and arms during longer sessions. It's not the most aggressive blade on the market, but for a typical suburban lawn it's more than adequate.
Build quality is solid. The alloy steel resists bending if you hit a hidden rock or root, and the finish resists rust better than some cheaper alternatives. That said, like any mower blade, it will eventually need sharpening. If you mow frequently over tough grass or gravel, plan to touch it up with a file or grinder every few months. The lightweight design (just under 0.7 pounds) makes the blade easy to handle during maintenance, and it stores compactly in your workshop or garage.
One limitation is that it's not a universal blade. It only fits 16-inch mowers with the specific center hole pattern. Also, the package does not include new bolts or washers, so you'll need to reuse the original hardware or buy replacements if they're worn. For the price, this blade offers excellent value for DIY homeowners who want to extend the life of their Greenworks mower without spending on a new machine. It's a practical, reliable choice that gets the job done neatly.
Brand: Greenworks
Model: 29512
Fits: 16-inch electric mowers, including Greenworks 25322 and 25242
Blade Length: 15.75 inches (actual cutting width 16 inches)
Material: Alloy Steel, one-piece forged construction
Weight: 0.69 pounds
Dimensions: 15.75 x 1.97 x 0.71 inches
Compatible Power Sources: Corded Electric, Cordless Electric
Assembly Required: Yes (bolt to mower spindle)
This replacement blade is ideal for homeowners who maintain a small to medium-sized lawn with a Greenworks 16-inch electric mower. It's perfect for routine weekly mowing of Bermuda, fescue, or rye grass. Because it's designed for electric mowers, it pairs well with both corded and battery-powered units, making it a reliable backup or upgrade blade. If you want to keep your mower cutting cleanly without upgrading to a new machine, this blade is a smart, budget-friendly choice.

Pros
- Heavy-gauge metal construction feels solid and durable.
- Dual functionality as both a blade lock and balancer adds real value.
- Wide compatibility with popular mower brands and series.
- Simple to use with an easy-to-turn handle and no batteries or power source required.
Cons
- The rubber contact disk is rigidly attached and may cause the disk to tear over time.
- Paint finish can chip easily, as noted in user feedback.
- Only works on mowers with a deck width of 42 inches or less.
The VoltRidge Universal Mower Blade Removal Tool is a simple but effective accessory for anyone who maintains their own lawn mower. It replaces the old trick of jamming a block of wood against the blade to keep it from spinning. Instead, this metal clamp locks onto the blade and rests against the mower deck, giving you a steady platform to loosen or tighten the blade bolt with a standard socket wrench. That alone makes blade swaps faster and a lot safer.
This tool is best suited for homeowners and DIY lawn care enthusiasts who own walk-behind or riding mowers from MTD, Cub Cadet, Troy-Bilt, Bolens, Ryobi, Yard-Man, or Yard-Machines. It covers the common 11A, 12A, and 13A series and can handle single or double blade configurations up to 42 inches wide. If you sharpen your own blades or swap them seasonally, this tool cuts down on frustration and wrestling with the blade under the deck.
Beyond blade removal, the tool also includes a built-in balancer. After sharpening, you can set the blade on the tool to check if it hangs level. An unbalanced blade causes excessive vibration, which wears out spindle bearings and makes the mower run rough. This feature helps you catch that before reinstalling, saving engine wear and providing a smoother cut.
Build quality is solid overall, with heavy-gauge metal that feels like it will hold up season after season. The clamp handle is easy to turn, even with greasy gloves. However, a few users noted the paint can chip off on arrival, and the rubber disc that contacts the deck is not a swivel joint, which could lead to tearing if you crank too hard. These are minor annoyances rather than deal-breakers given the low price point.
For around ten bucks, the VoltRidge tool earns its place in any mower maintenance kit. It simplifies a dirty job and adds blade balancing to boot. If you already own a wrench and a sharpening file or grinder, this is a small upgrade that pays for itself in time saved and smoother mowing. Recommended for anyone who wants to keep their mower blade in top shape without guessing or struggling.

Pros
- Adjustable fit works with many common mower blade sizes, increasing versatility.
- Rust-resistant metal build feels solid and durable for long-term use.
- Easy-turn knob makes adjustments quick and tool-free.
- Compact and lightweight, easy to store or carry to the jobsite.
Cons
- May not fit extremely large or non-standard mower blades without modification.
- Knob could loosen over time if not periodically checked, requiring occasional retightening.
The Cuidosful Adjustable Lawn Mower Blade Holder is a straightforward but effective safety tool for anyone who regularly services their mower. Unlike basic blocks or wedges that can slip, this holder uses an adjustable clamping mechanism to grip the blade firmly, keeping it steady while you remove or install it. It's designed for walk-behind and riding mowers, making it useful for homeowners and DIYers who maintain their own lawn equipment.
In real-world use, the adjustable width is the standout feature. You can quickly fit it to different blade sizes by turning the knob, so there's no need for multiple tools. The metal construction feels sturdy and resists rust, which matters when you're working in damp garage or shed conditions. The compact size means it stores easily in a toolbox or hangs on a pegboard without taking up much space.
One area where this tool shines is safety. Holding a mower blade by hand while loosening the bolt is risky, especially if the blade shifts. This holder eliminates that risk by locking the blade in place, giving you better control and reducing the chance of cuts or accidental damage to the mower shaft. It's a simple upgrade that makes routine maintenance less stressful.
Build quality is decent for the price. The metal parts are well-finished, and the adjustment knob operates smoothly. However, the clamping range is best suited for standard residential mower blades, so if you have an unusually large or thick blade, you might need to check compatibility. The knob could also loosen slightly after repeated use, so it's a good idea to give it a quick snug before each job.
Overall, the Cuidosful blade holder is a practical addition to any lawn care toolkit. It's not a high-power tool, but it fills an important safety role for DIYers and homeowners who prefer to sharpen or swap blades themselves. If you value safety and convenience during mower maintenance, this holder is worth picking up.

Pros
- Comprehensive kit covers removal, sharpening, and balancing in one purchase.
- Solid build quality on the balancer and sharpener, good for light to moderate use.
- Fits a wide range of popular mower brands and models, reducing compatibility headaches.
Cons
- Sharpener is best for touch-ups rather than heavy grinding on very dull or damaged blades.
- Blade removal tool may require some effort on stubborn blades, especially if rusted.
- Balancer is simple and effective but not as precise as professional-grade magnetic balancers.
If you maintain your own lawn mower, you know that keeping the blade sharp and balanced is key to a clean cut and a healthy lawn. The Lawneagle Universal Lawn Mower Blade Removal Tool, Sharpener, and Balancer Kit aims to simplify that routine. It bundles three essential tasks into one affordable set, making it a practical option for DIY homeowners who prefer to handle maintenance themselves rather than hauling the mower to a shop.
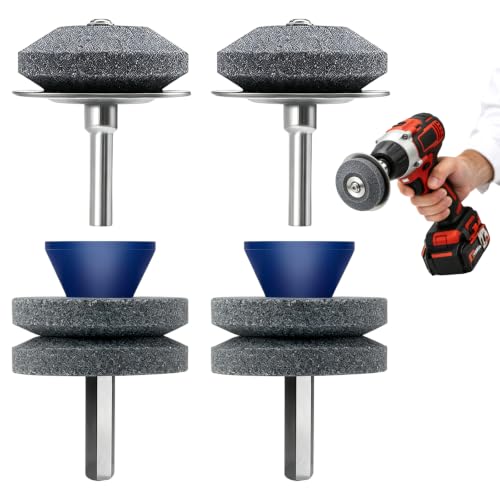
This kit replaces the common Cub Cadet and MTD 490-850-0005 blade removal tool, so it fits a wide range of popular mower models. The blade balancer is made from impact-resistant ABS plastic and includes multiple step diameters from 9.5mm up to 35mm, accommodating various blade center holes. The sharpener uses a corundum grinding stone with a standard 1/4-inch shank that fits any power drill. Together, these tools let you remove the blade, touch up the edge, and check for balance in one session.
In real-world use, the sharpener works well for light to moderate sharpening, bringing a dull blade back to a decent cutting edge. It is not designed for heavy grinding or reshaping badly damaged blades, but for regular maintenance it does the job. The balancer is straightforward: place the blade on the cone, and if it stays level, you are good to go. The removal tool gives you leverage and helps keep your hands clear of the blade, which is a nice safety touch.
Build quality is decent for the price. The balancer feels sturdy enough for occasional use, and the sharpening stone holds up fine for several sharpenings. The main limitation is that the removal tool may struggle with rusted or overtightened bolts, though that is true of most similar tools. Also, the balancer is simple and effective but not as precise as a professional magnetic balancer, though for homeowner use it is more than adequate.
Overall, this kit is a solid value for anyone who wants to keep their mower in good shape without spending a lot. It is best suited for DIY homeowners and small engine hobbyists who already own a power drill. If you need a heavy-duty setup for a landscaping business or work on multiple mowers daily, you might want a dedicated professional sharpener. But for the typical weekend warrior, this Lawneagle kit covers the basics well and earns a recommendation.

Pros
- Sturdy one-piece steel build stands up to regular mowing without bending or dulling quickly.
- Exact 17.72-inch length and 1.97-inch width match Greenworks OEM specs for a proper fit.
- Semicircle and circle hole options accommodate different spindle designs for broader compatibility.
- Great value for homeowners who want a reliable blade without the OEM price tag.
Cons
- Limited to 18-inch Greenworks mowers, so not universal for other brands or sizes.
- No customer reviews yet, making it harder to gauge long-term performance from other users.
- May require checking blade thickness (0.71 inch) against your mower’s spindle to ensure a secure fit.
If you own a Greenworks 18-inch mower and need a replacement blade, the SWAPARTS Lawn Mower Blade is a solid, budget-friendly option. Designed to fit models like the 33303463, 25012, and 2519402, this blade aims to restore your mower's cutting performance without forcing you to buy an expensive OEM part. It's a straightforward accessory for homeowners who prefer a quick, direct swap over messing with adapters or modifications.
This blade measures 17.72 inches long and 1.97 inches wide, matching the stock dimensions for Greenworks 18-inch decks. The one-piece steel construction feels sturdy enough for regular weekend mowing, and the manufacturer claims it resists wear and tear better than cheaper stamped blades. In practice, that should mean cleaner cuts and less time sharpening or replacing blades mid-season. The semicircle and circle hole options also give it some versatility, though you'll want to double-check your mower's spindle shape before ordering.
At just 16 ounces, it's lightweight, which helps keep your mower balanced and reduces vibration during use. Installation is straightforward: remove the old blade, align the new one, and torque it down. The included single blade is enough for one mower, so if your mower uses two blades, you'll need to buy a pair. There are currently no user reviews, so long-term durability remains unverified, but the specs suggest it should handle typical residential lawns without issue.
The main drawback is specificity: it only fits 18-inch Greenworks mowers, so it won't work on other brands or deck sizes. Also, the lack of reviews means you're relying on the manufacturer's claims alone. However, if you need a no-fuss replacement that won't break the bank, this SWAPARTS blade is a practical choice. It's best for DIY homeowners who maintain their own lawns and want a reliable, affordable part to keep their mower running efficiently.
Product Dimensions: 18.9 x 2.36 x 1.41 inches
Item Weight: 16 ounces
Length: 17.72 inches
Width: 1.97 inches
Thickness: 0.71 inches
Hole Shape: Semicircle and circle
Compatible Models: Greenworks 33303463, 25012, 2519402
Material: One-piece steel
Package Includes: 1 lawn mower blade

Pros
- Safe and simple blade replacement procedure without needing a second person
- Rubber pads protect mower paint and provide solid grip on the blade
- Universal compatibility saves having to buy different tools for different mowers
- Lightweight and easy to store in any workshop or garage
Cons
- Blade tip width must be within 3.3 inches and the distance from tip to mounting plate less than 2.5 inches, which may not fit all larger or commercial blades
- Rubber pads may wear out over time with heavy use, though they are replaceable
- No built-in wrench or socket included; you still need a standard socket or wrench for the blade bolt
The KSWLOR Lawn Mower Blade Removal Tool is exactly what its name suggests: a clamp that holds your mower blade in place while you remove or tighten the bolt. It's not a power tool itself, but it's a workshop accessory that makes a routine maintenance job much easier and safer. Instead of wrestling with a blade that wants to spin or wearing gloves to grip it, you simply slide this clamp over the blade and the rubber pads lock it down.
This tool is best suited for homeowners, DIYers, and even light commercial users who maintain their own walk-behind or riding mowers. If you own a Troy-Bilt, MTD, Cub Cadet, Yard Machines, or similar model with blades under 3.3 inches wide at the tip, you are covered. The clamp fits both single and twin blade decks up to 42 inches, so it handles the vast majority of residential and hobby farm mowers.
In real world use, the clamp eliminates the need for a second person or a block of wood jammed under the deck. The rubber pads (about 1.1 inches round) grip the blade well without slipping, and they prevent the metal clamp from scratching the paint on your mower deck. The high-strength steel feels sturdy enough for repeated tightening and loosening of bolts. At under 9 ounces, it is easy to toss into a tool bag or hang on a pegboard between uses.
There are some limitations worth noting. The tool only works on blades where the tip width is within 3.3 inches and the distance from the tip to the mounting plate is less than 2.5 inches. Very large commercial blades or offset blades may not fit. Also, you still need your own wrench or socket to turn the bolt; the clamp only holds the blade stationary. Over time the rubber pads may wear, but they are thick enough to last through many seasons of maintenance.
Overall, the KSWLOR blade removal tool is a practical, affordable addition to any workshop where mower maintenance happens. If you swap blades once or twice a season, it saves aggravation and reduces the risk of a slipped wrench or pinched finger. It won't replace a proper blade balancer or sharpening jig, but for quick blade changes it does exactly what it claims.
Product Dimensions: 3.6 x 1.8 x 3 inches
Item Weight: 8.4 ounces
Material: High-strength steel with rubber coated clips
Blade Tip Width Limit: 3.3 inches (85 mm)
Max Distance from Blade Tip to Mounting Plate: 2.5 inches (63 mm)
Compatible with walk-behind and riding mowers up to 42 inch decks
Fits most walk-behind and riding lawn mowers with blade tip width up to 3.3 inches. Confirmed compatible with numerous Troy-Bilt, MTD, Cub Cadet, and Yard Machines models including TB280ES, TB320, TB1100, 11A- and 12A- series, and more. Always verify your blade dimensions before purchase.
Comprehensive Guide to Changing Your Lawn Mower Blade Safely
Changing a mower blade is a fundamental maintenance task that directly dictates cut quality, engine efficiency, and turf health. When grass blades appear frayed or brown at the tips after cutting, a dull or nicked cutting edge is almost always the root cause. Completing this mechanical task requires following a deliberate sequence to protect your hands, prevent engine flooding, and ensure secure hardware retention.
Many homeowners wonder about the exact mechanical sequence and what specialized tools make the task manageable without extra help. The process involves isolating the power source, tilting the deck in the correct direction, immobilizing the cutting assembly, loosening the mounting bolt, and aligning the replacement blade accurately. Taking time to understand the role of specialized clamps, center hole patterns, and proper balance ensures a smooth replacement experience from start to finish.
Safety Preparation and Disconnecting Power Sources
Every mower maintenance procedure must begin by completely neutralizing any possibility of accidental engine ignition or motor activation. On gas-powered push or walk-behind mowers, firmly disconnect the spark plug boot from the spark plug and tuck the wire away from the terminal. If you turn a blade by hand while the spark plug wire remains attached, the engine compression cycle can theoretically trigger an unexpected engine rotation. Taking this simple five-second step eliminates mechanical danger and creates a secure working environment.
Electric and cordless battery-powered mowers require their own distinct power isolation procedures before touching the underdeck area. For cordless models, always remove the lithium-ion battery pack entirely and remove any safety keys from the operator console. If you are servicing a corded electric model, disconnect the power cord from both the extension lead and the wall receptacle. Wearing thick leather work gloves during these preparation steps shields your hands from accidental contact with nicked, jagged, or sharp metal edges.
Clearing your work area is another important safety step that prevents slips and falls while handling heavy steel components. Choose a flat, stable surface such as a concrete garage floor, paved driveway, or level patch of firm ground. Ensure adequate lighting so you can clearly inspect spindle threads, mounting washers, and deck housings without straining your eyes. Gathering all necessary hand tools, gloves, and replacement parts beforehand prevents frustrating delays once the mower is tilted.
Tilting the Mower Deck Without Flooding the Engine
Gaining access to the mower blade requires tipping the machine onto its side, but doing so improperly can cause severe mechanical headaches on gas mowers. Always tilt a walk-behind gas mower so that the air filter and carburetor face upward toward the sky. If you tilt the mower with the air filter facing downward, engine oil can drain into the carburetor throat, saturate the air filter, or seep into the muffler. An oil-soaked air filter restricts airflow and can cause heavy white smoke or hard starting when you restart the mower.
Running the fuel tank low before starting blade maintenance makes the tilting process cleaner and much safer. A full fuel tank can leak through the gas cap breather hole when the mower rests on its side, creating a fire hazard and staining your workspace. If the fuel tank is currently full, you can siphon excess fuel into an approved container or simply mow until the fuel level drops. Battery-powered and electric mowers do not contain crankcase oil or gasoline, allowing owners more flexibility when tilting the chassis for service.
Once the deck is raised, inspect the underdeck cavity for accumulated grass clippings, mud, and caked debris. Wet clippings trapped against the steel deck promote rust and interfere with optimal airflow during mowing operations. Use a plastic putty knife or stiff scraper to clear out packed turf before attempting to reach the mounting bolt. Clearing away debris ensures that removal tools sit flush against the deck lip and prevents grit from entering spindle threads.
Securing the Blade and Using Removal Clamps
The primary mechanical challenge when loosening a blade retaining bolt is that the mower spindle naturally spins freely in its bearings. Attempting to hold the blade still with an ordinary gloved hand while applying heavy socket wrench torque is dangerous and often ineffective. Dedicated blade clamps, such as the MaxPower 339079 Universal Mower Blade Removal Tool or the 490-850-0005 clamp, attach firmly to the deck housing to block rotation. These metal clamps act as a mechanical stop, holding the cutting edge steady so all your wrench torque directly loosens the stubborn bolt.
Alternative tools like the Lawneagle Universal Lawn Mower Blade Removal Tool or the Adjustable Lawn Mower Blade Holder feature turn knobs that clamp securely onto varying deck rim profiles. By locking the tool against both the deck wall and the blade face, you eliminate slippage and protect your hands from sudden slips. Property owners who lack a specialized clamp often wedge a thick block of scrap wood between the blade and the inner deck wall. While a wooden block can function as a temporary stop, metal clamps provide superior stability and reduce the likelihood of awkward slips.
When positioning your clamp or mechanical stop, place it on the side of the blade that opposes your wrench rotation. Standard mower blade bolts loosen counterclockwise, meaning the blade will want to rotate counterclockwise as you turn the wrench. Securing your clamp against the trailing edge on the left side traps the blade firmly against the mower chassis. Checking that the clamp screw is tight before applying socket force prevents the tool from kicking loose under heavy pressure.
Loosening the Retaining Bolt and Hardware Order
With the blade securely immobilized, select a heavy-duty six-point socket that fits the center bolt or spindle nut precisely. Standard twelve-point sockets can slip and round off the bolt corners, especially if the bolt has accumulated dirt or mild corrosion over several mowing seasons. A long-handled breaker bar or standard ratchet provides the mechanical leverage necessary to crack the factory torque seal. Inspect our guide on mower blade setup procedures to see how hardware alignment interacts with various spindle designs.
Apply steady, even counterclockwise force to the wrench handle rather than jerking or kicking the tool. Most walk-behind mowers utilize standard right-hand threads that loosen counterclockwise, though some specialty multi-spindle commercial decks may feature reverse threads on specific spindles. If the bolt resists turning, applying penetrating fluid around the washer flange and allowing it to soak for ten minutes can dissolve seized rust. Tapping the bolt head lightly with a small hammer can also help break thread corrosion without damaging the spindle shaft.
As the retaining bolt loosens, pay close attention to the arrangement and orientation of all accompanying washers, spacers, and adapters. Many mowers incorporate a concave Belleville washer or friction washer designed to maintain constant spring tension against the blade body. The cupped or domed side of a Belleville washer must face toward the bolt head, while the outer rim presses against the blade. Keeping these hardware components lined up in their exact removal order ensures you will reinstall them without confusion later.
Verifying Replacement Blade Dimensions and Center Hole Geometry
Before installing a new cutting component, thoroughly compare the replacement part with your original blade to ensure complete physical compatibility. Never rely solely on deck cutting width, because individual blade length often differs from the total advertised mowing path. For instance, the Maxpower 331528B Mulching Blade measures 21 inches in length and 2-1/4 inches in width, designed specifically for compatible 21-inch MTD, Cub Cadet, and Troy-Bilt mowers. Similarly, the SWAPARTS blade for Greenworks 18-inch mowers measures 17.72 inches in actual blade length to ensure adequate deck clearance.
Center hole geometry represents one of the most critical fitment factors when selecting replacement blades for any lawn mower. Manufacturers utilize distinct mounting shapes, including round holes, star patterns, semi-circles, and specialized bow tie cutouts. The MaxPower 331528B blade incorporates a specific bow tie center pattern with 5/16-inch outer guide holes spaced 2.5 inches apart center-to-center. Installing a blade with the wrong center hole shape can damage the spindle adapter, introduce violent vibrations, or result in sudden blade separation during operation.
When choosing between factory replacements and aftermarket components, review aftermarket mower blade options to evaluate how OEM cross-references align with your specific mower model suffix. A blade designed for a 16-inch corded mower, like the Greenworks 25322 or 25242 replacement blade, will not fit an 18-inch or 21-inch model even within the same brand family. Double-checking part numbers such as 742-0741, 942-0741, or 33303463 against your equipment manual prevents costly fitment errors and unnecessary returns.
Balancing and Inspecting Before Final Mounting
Checking the balance of any new or sharpened blade before installation prevents destructive deck and engine vibrations. An unbalanced blade spins with unequal centrifugal force, which rapidly wears out spindle bearings, loosens engine bolts, and damages mower decks. Multi-tiered cone balancers, such as the ABS plastic stepped balancer included with the Lawneagle kit, offer an inexpensive and highly accurate method to verify balance. Stepped balancers accommodate varying center hole diameters, ranging from 9.5 mm up to 35 mm, ensuring versatile compatibility across brands.
To test blade balance, place the stepped cone on a level workbench and seat the center hole of the blade squarely on the corresponding tier. A properly balanced blade remains completely horizontal without tipping toward either side. If one cutting wing dips downward, that side carries excess metal that must be lightly ground or filed away from the trailing edge. Never grind metal from the cutting edge itself or alter the blade tip lift geometry when correcting an imbalance.
Inspect the blade body for any shipping defects, bends, or irregular warping along its length before placing it on the spindle. High-quality replacement blades, such as one-piece forged steel units, offer uniform thickness and structural resilience. The powder coating found on many brand-new blades, like MaxPower products, is intentionally applied for corrosion protection and will wear away cleanly during the first mowing session. Verifying balance and physical integrity takes only two minutes and ensures smooth, vibration-free operation across the entire mowing season.
Installing the New Blade in the Correct Orientation
Installing a mower blade upside down is one of the most frequent mistakes made by homeowners performing DIY maintenance. A blade mounted inverted presents its dull trailing edge to the grass, which beats and rips turf rather than cutting it cleanly. Furthermore, the curved aerodynamic wings will push air and clippings downward toward the soil instead of generating lift for mulching or bagging. Turf cut with an inverted blade immediately shows white shredded tips, ragged growth lines, and increased susceptibility to fungal diseases.
Determining the correct orientation requires identifying the cutting edge and the raised lift wings on the blade wings. The flat, sharp cutting edge must face the direction of rotation, which is typically clockwise when viewing the mower from underneath. The curved, raised wings or wind vanes must point upward toward the underside of the mower deck housing, not downward toward the ground. Many manufacturers stamp words such as “Bottom,” “Grass Side,” or specific part numbers on the surface intended to face the lawn.
Carefully seat the blade onto the spindle adapter or mounting flange, ensuring that all alignment pins, stars, or bow tie splines engage completely. The blade must sit completely flush against the spindle face without any gaps, tilting, or wobble. If the blade rocks back and forth when seated, the spindle adapter may have sustained wear or impact damage from past obstacles. Never attempt to force a mismatched blade onto an incompatible spindle hub by overtightening the center bolt.
Tightening Hardware and Post-Service Checks
Once the blade sits flush against the spindle, rethread the retaining bolt, washers, and retaining hardware by hand. Starting the bolt threads by hand prevents cross-threading, which can ruin the internal threads of the expensive spindle shaft. Reinstall your removal clamp or blade stop against the opposite side of the deck to prevent clockwise blade rotation as you tighten. Ensure that the curved Belleville washer retains its correct outward crown so it provides proper clamping spring tension.
Torquing the mounting bolt to manufacturer-specified tightness ensures the blade remains securely fastened under heavy rotational loads. While exact torque requirements vary by brand and deck size, walk-behind mower bolts generally demand substantial tightness, often between 35 and 50 foot-pounds. Using a calibrated torque wrench guarantees you achieve the correct specification without stripping threads or leaving the bolt dangerously loose. If a torque wrench is unavailable, a standard ratchet must tighten the bolt firmly until the spring washer flattens completely against the blade body.
After tightening the hardware, remove the blade clamp, tools, and cleaning scrapers from under the mower deck. Gently spin the blade by hand while wearing heavy gloves to confirm it rotates freely without rubbing against the deck shell, baffles, or discharge chute. Once verified, return the mower to its normal upright four-wheel position on level ground. Reattach the spark plug wire or reinstall the battery pack, start the motor, and listen closely for any unusual vibration, knocking sounds, or uneven operation.
Performing routine blade replacements every season preserves your mower’s mechanical components and delivers manicured, healthy lawn results. Taking a methodical approach to safety, using dedicated blade clamps, matching OEM center hole patterns, and verifying balance eliminates the guesswork from the task. With the right tools and proper procedural care, changing your lawn mower blade is a quick, rewarding DIY job that keeps your yard looking its absolute best.



Write Your Review
No reviews yet. Be the first to share your experience!